


Discover - UHD Iris
Background
Here at Texturing XYZ we always look for ways to improve artists workflow, trying to make the texturing process as easy and convenient as possible.
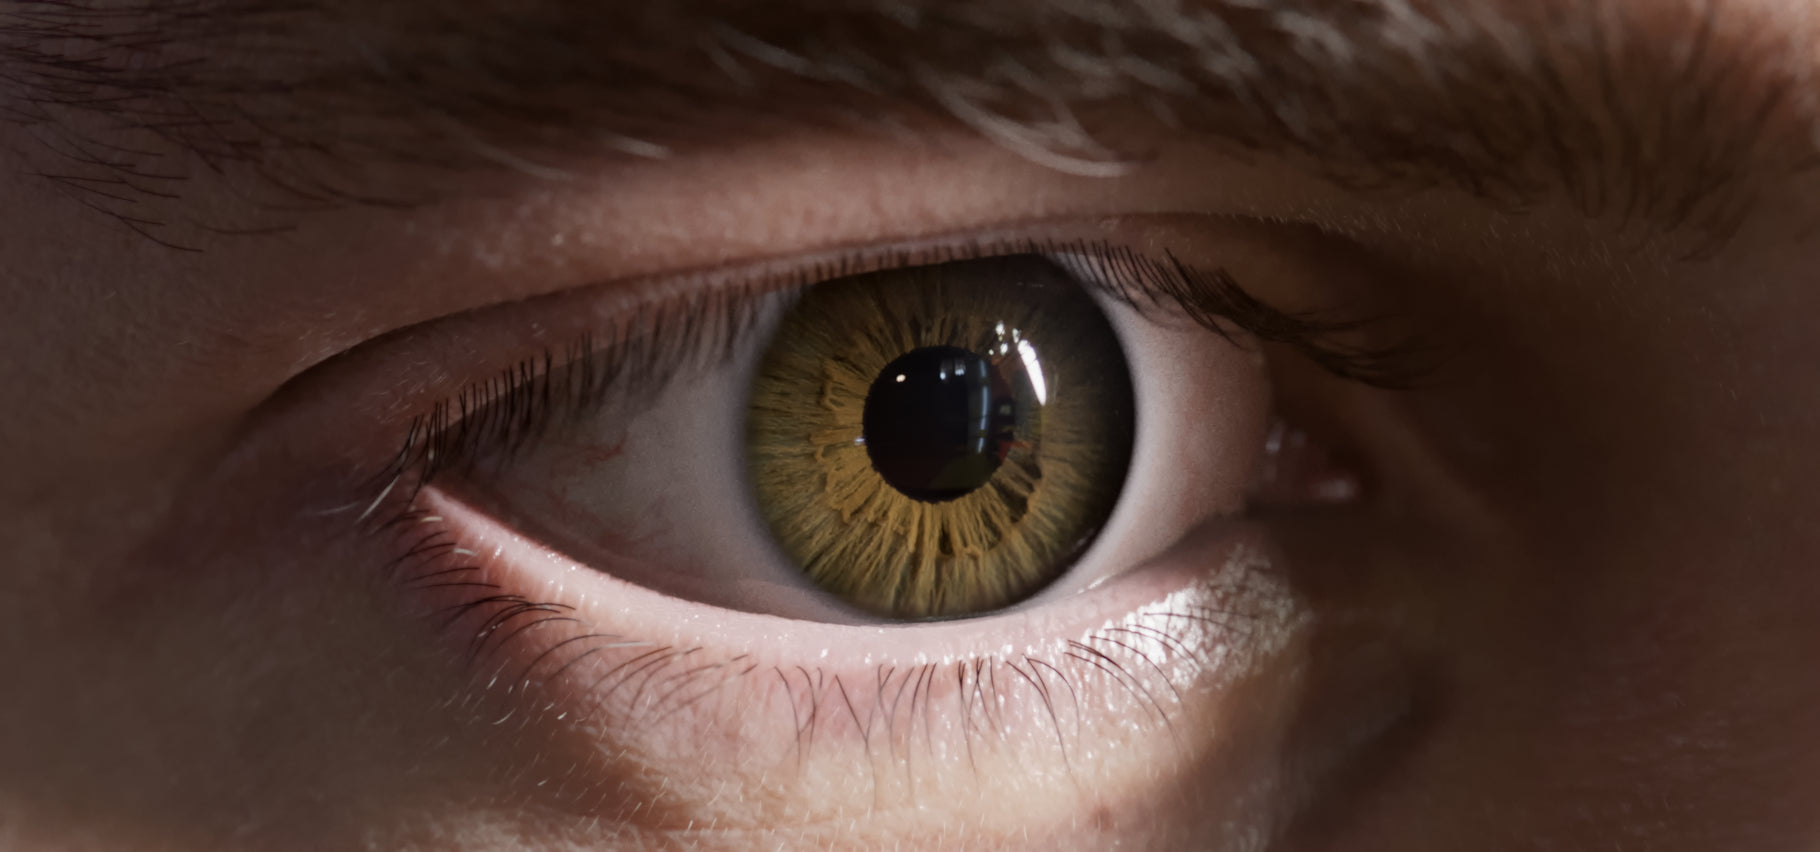
Three years ago we decided to focus our attention on the eyes, a very important feature when it comes to highly realistic rendering, and eventually we managed to create the multi-channel iris packs, blue, green, and brown. To this day these packs are still very popular, and gives artists the possibility to be faster than ever and achieve impressive results.
However, we realized that as good as our multi-channel iris packs are you are limited in terms of resolution, tweaking, and that extreme close ups are lacking details. These maps are good enough quality and for most projects they should work very well.
The key is the geometry
From nothing to accurate simulations
Therefore, taking everything we've said into account, we wanted to update our library to level up the quality standards and give a wider range of possibilities to all the artists out there looking for the missing 10% between CG and photo-realistic renders.
Ultimately we developed a fully 3d procedural iris system. We went from a 2d texture (our previous generation iris packs) to a mesh containing all the fibers and smallest details. This transition brought many advantages : Realistic illumination, accurate lighting representation, infinite color variations and endless possibilities from any point of view.
We made a library containing 100 packs, giving you a lot of options and a unique looking iris for all your projects every single time.

| Art by Şefki Ibrahim - Sample and Hold - Pack used : 084 |
-
2 high-poly geos, the top and bottom of the iris.
-
1 low-poly geo (to be used with the displacement map).
-
1 height/displacement map.
-
6 different ID maps known as utility maps.
-
1 ambient occlusion map.
-
1 fresnel map.
-
3 different shaders, blue, brown and green, those shaders are just a base and eventually you'll have to tweak them to achieve the look you want.
-
3 albedo maps, blue, brown and green, baked from the base shader, these maps can be tweaked in photoshop or nuke.

Since the geometry is nearly perfect, you don't have to worry about the mesh, you just need to pick an iris pack from the library and then start the texturing/shading process choosing one of the many workflows available.

How to use and what to expect ?
Standard workflow (low poly mesh)
Import the low poly mesh, place it in position, then assign a standard shader from your preferred renderer (aiStandardSurface, principle shaders, vray material, pxr surface etc..) to it, use the color map provided and the displacement.
A tutorial on how to use the standard workflow is available here.
Advanced Workflow (high poly mesh & volume)
Why volume ?
As you may have noticed, to use this particular workflow you will have to convert your geometry to a volume. The reason is that this method allows you to have a greater control over the shading process in a non destructive way. You can control how much of a layer you want to show and where you need more or less density.
For example, brown irises have a very dense top layer, opposed to the blue iris which has almost no top layer and only bottom fibers. So keep in mind to look at references and to always start your shading process by matching the density and then the color. More information below in the shading paragraph of this article.
Step 1: Import the top and bottom meshes, put them in a group.
Step 2: Import the baseShader we made in Arnold (Download here) and put the camera projection in the iris group previously created. In maya, the camera is going to take the name of the imported shader. Rename it "projection".
(the camera should pop up in your outliner once you import the base shader)
Step 3: Go inside the projection camera to make sure the camera view fits the corner of the geos, like the image below.

Importing the shader and setting the camera

The camera projection must be perfectly in front of the iris or the id maps will not match the high poly geo.
You can check if everything is aligned by assigning a Surface/Constant shader to the top or bottom mesh and then using one of the IDs as a base color. The camera projection must be set in perspective and linked to the projection camera. Here we linked "projectionShape".

We moved the camera on the Y axis, closer or further from the geo to make sure the ID map is aligned.
The camera projection is only required when using the high poly meshes, the low poly mesh is UV mapped and doesn't need this procedure.
Converting the geometry to a volume (Arnold renderer)
Convert the geometry to a volume. In Arnold just right click on the geometry and then increase the Step Size to around 0.010 and the Volume Padding to 0.100 to convert any mesh to a volume. Smaller and therefore more accurate sizes will increase render times while larger sizes will render more quickly.
If you work with another renderer, please refer to their documentation, make sure it can convert a geo to volume, so you can reproduce this workflow easily.

Shading the iris


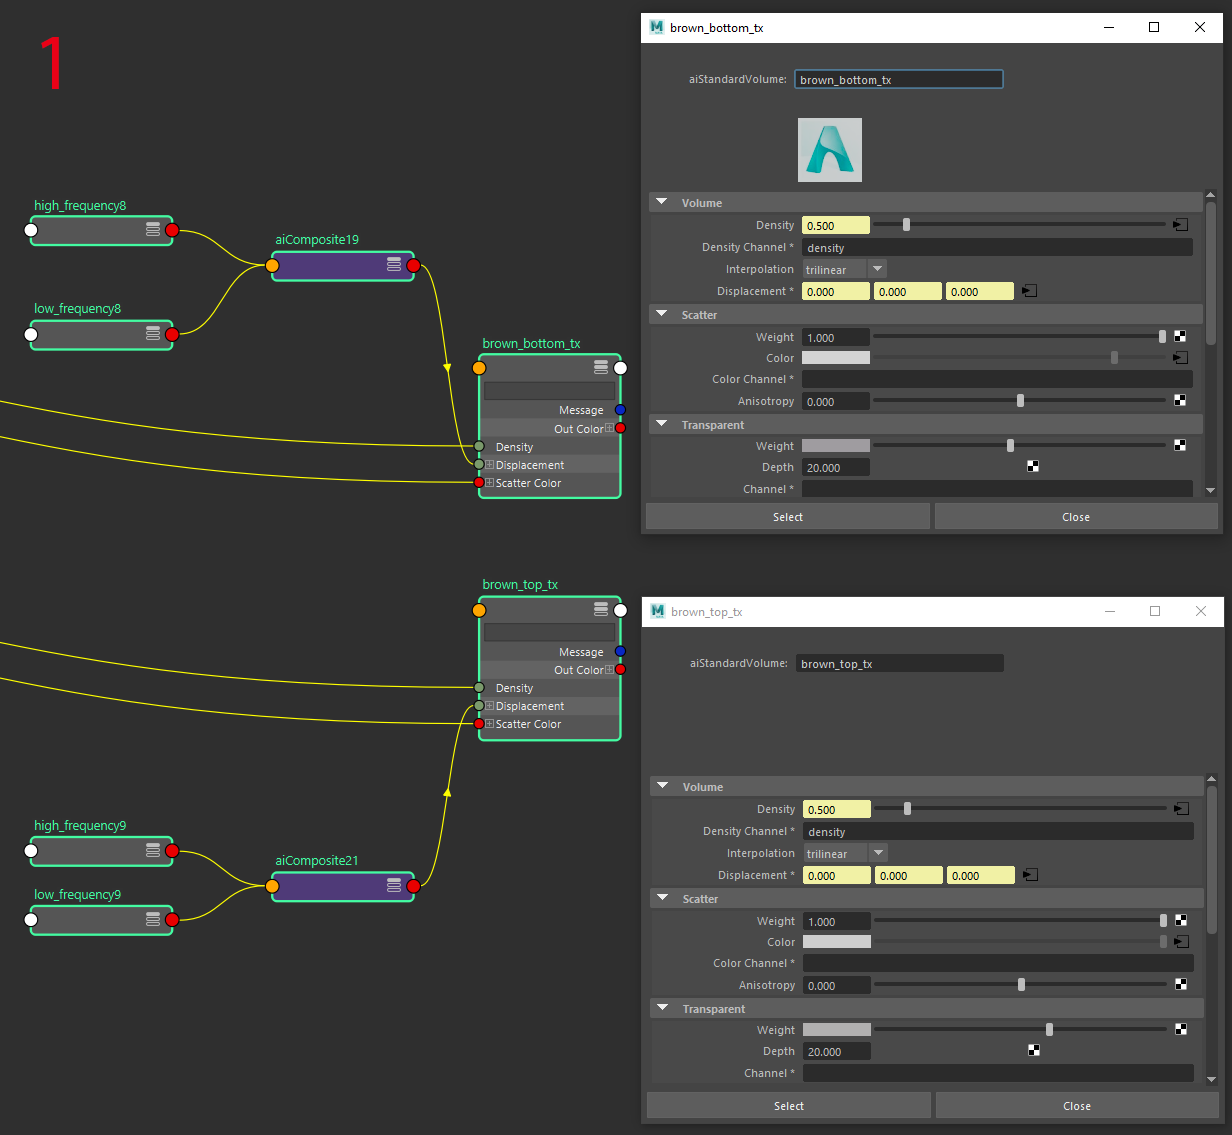 1 Above are the two aiStandardVolume shaders that you have to assign to the top and bottom of the iris. From here everything is already set up. However, you can still play with the Transparent Weight, which is useful to add some color variations and the Transparent Depth that we recommend you to leave at 20. More information here : Standard Volume
 2 These are two layeredTexture nodes, they are the only thing you need to worry about. From here you can control the color and the density of the top layer and the bottom layer of the iris.
Density
In the video below we assigned a uniform color to the top (red) and bottom (blue) layers, then we are able to control the amount of density of each layer and the amount of density of the inner and outer iris, here we used a simple remap, so the transition is very harsh, but you can add a noise texture and create a very organic transition. Keep in mind what we said above, look at references and first match the density and then add color.

ID maps and how to use them
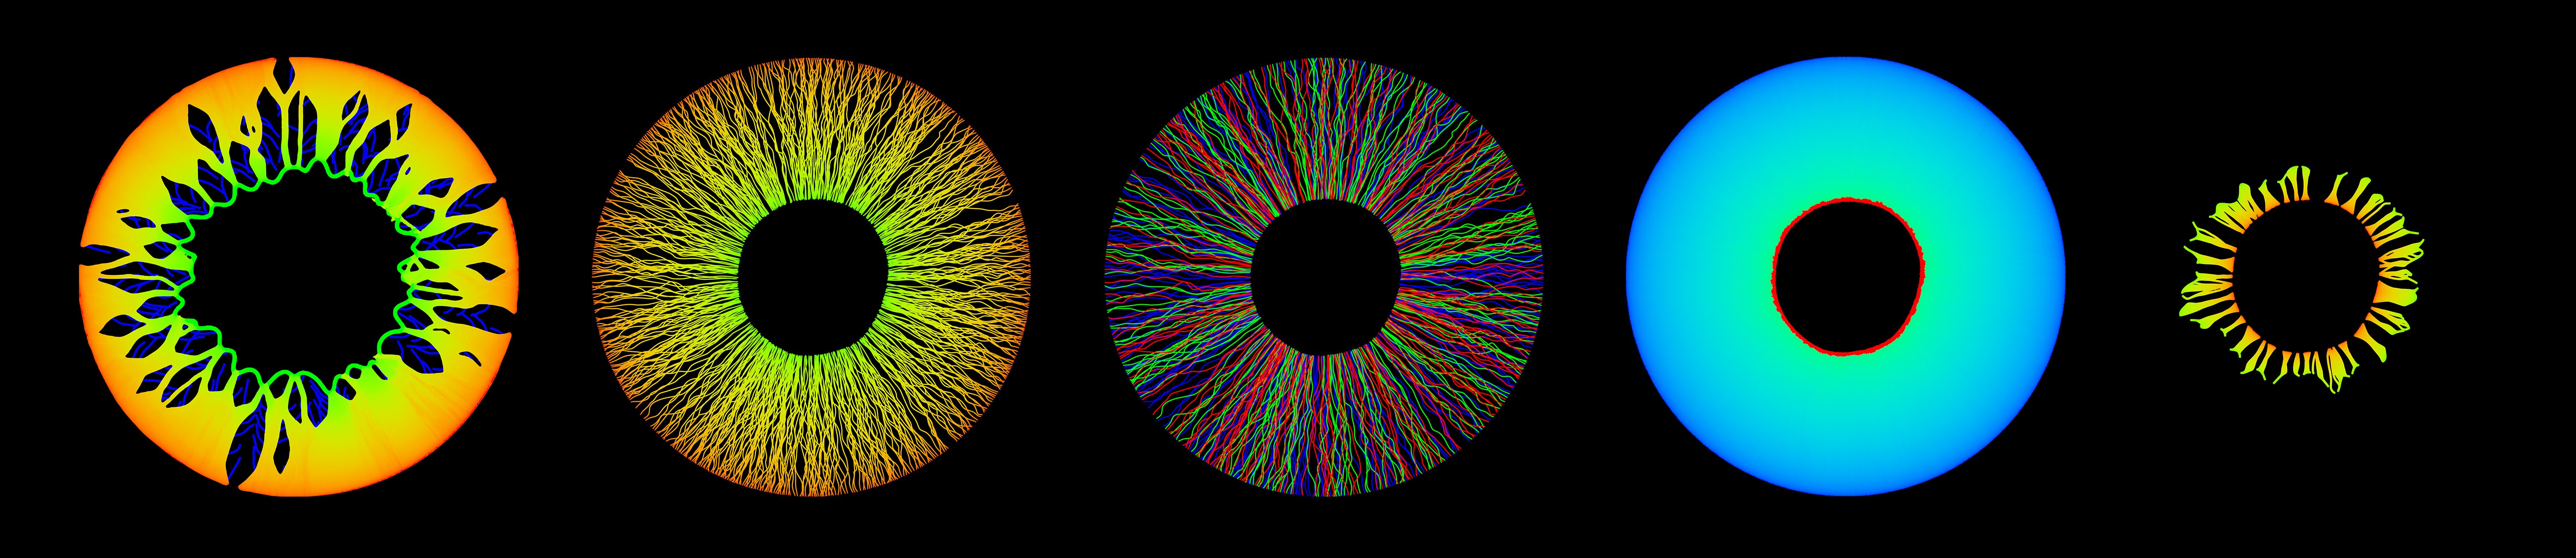
We use a "channels" node (equivalent of the aiShuffle in Arnold) and a remapHSV to isolate section of the ID maps, then we plug the remapHSV in the alpha slot of the layeredTexture.
COLOR

You can create all sorts of ID masks and have a full control over the shading process, creating a realistic or stylized shader depending on your project.

Here for example we used the id_01, which is very useful to create a color or density variation between the center (green color) and the edge (red color) of the iris. Then we isolated the green channel with a "channels" node
Using the provided ID maps you should be able to create an infinite variety of irises and since this workflow is entirely procedural and based on ID's, the shader you created will be compatible with any iris pack. You can create your own library of shaders that will work every time no matter the pack you choose.
UHD Iris XYZ Tool for Maya / Automatic UHD iris shading network / Arnold :
Script done by Richard Trouve
|
Download the script [Maya 2018+ / Arnold] |
Conclusion
Overall, our goal, as always, was to give artists more freedom, endless possibilities and let their imagination be the only limit. That is why we created a whole new concept of shading the eyes. Now your renders are going to be not only more realistic, but also more unique. Choose what eyes best define your character and create your own unique shader.
We cannot wait to see what the community is going to create.
Till next time, happy rendering!