


Alfred Roettinger / Realtime Eye
IntroductionI’m Alfred Roettinger, currently working as Lead Character Artist at Starbreeze Studios in Stockholm.
I have been an artist in the games industry for a long time but have worked with characters more specifically for the last eight years.
In my role I am always looking for ways to push quality within the team without negatively impacting development time and TexturingXYZ plays an important role in how we do that. It allows us to push the fidelity in our characters easily and has become indispensable to our workflow.
In this tutorial I’m going to go over how to use the iris maps to create a convincing real-time eye in Marmoset Toolbag,using Maya and ZBrush.
As well as how to use different shaders effects like refraction, caustic and sub surface scattering for the final image.
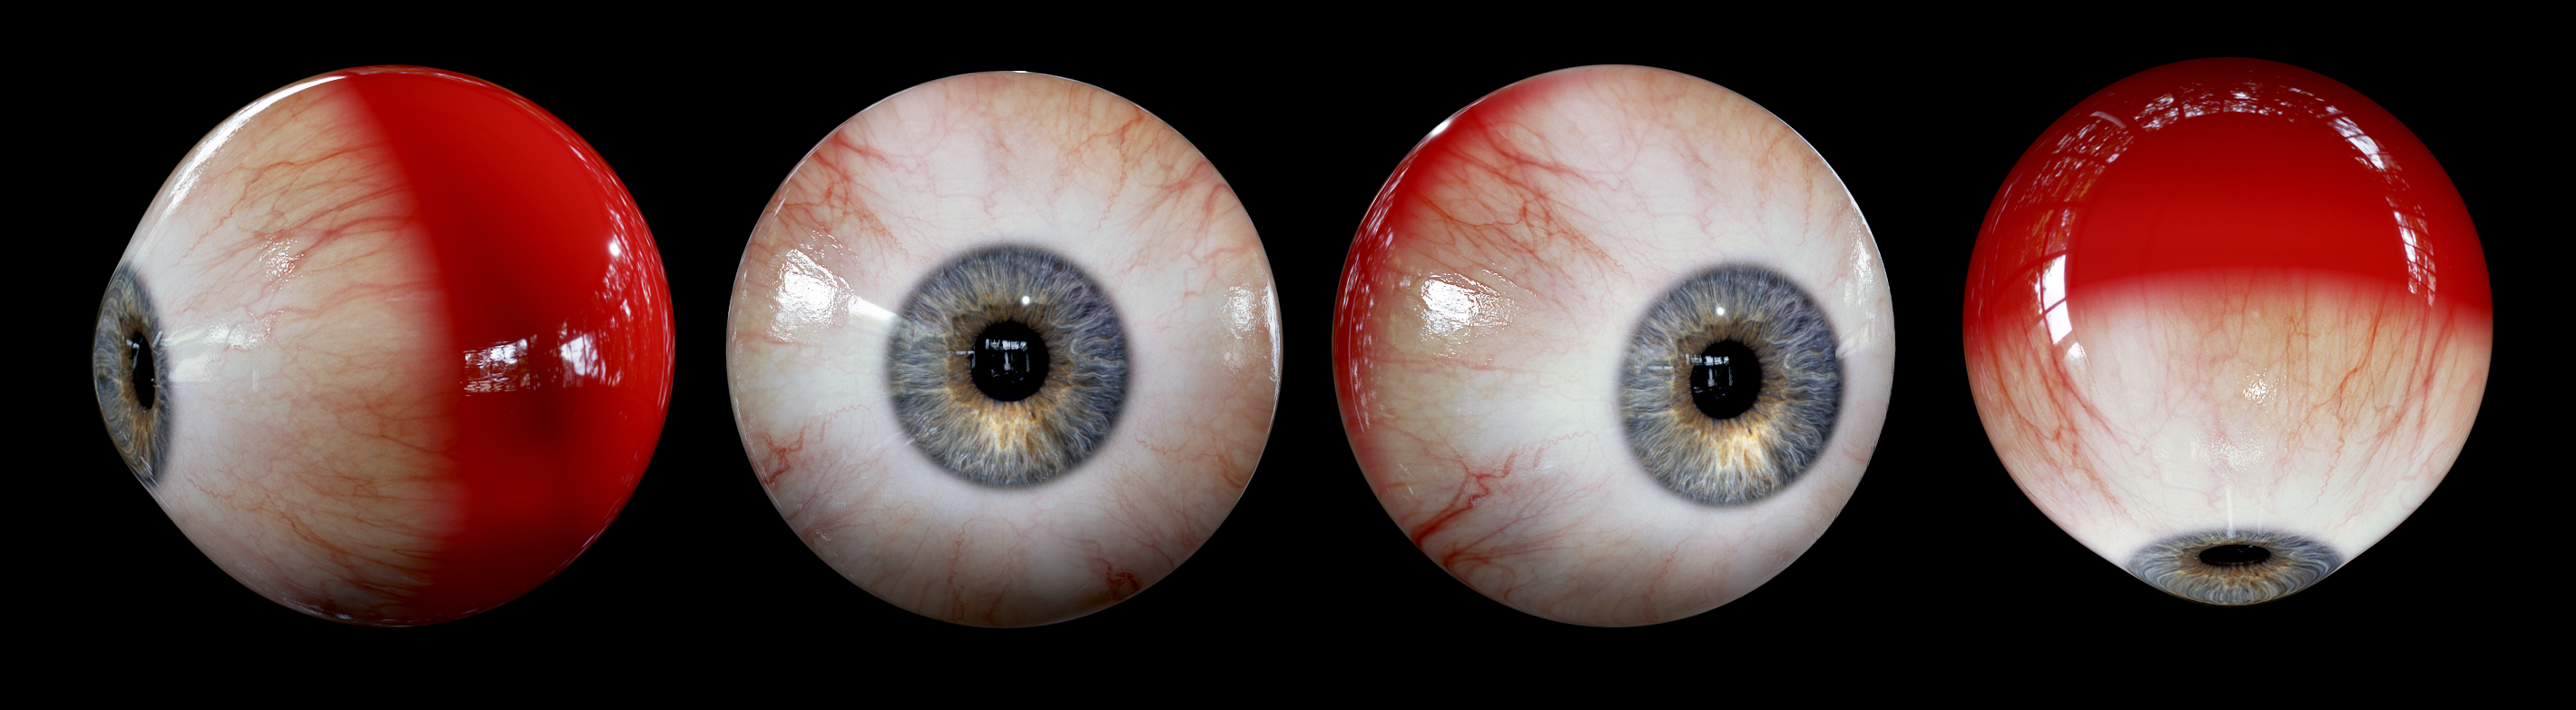
Part 1- MODELINGModeling the eye in Maya is a simple task but requires a few different components in order to create a realistic result.
For this we will need to make several meshes:
|
I usually model the cornea mesh starting with a Sphere then using the Edge Flow options in Multi-Cut along with soft select to create the dimple. I use a polygon Torus primitive scaled to form a Disc for the iris mesh and the sclera is just a duplicate of the cornea mesh deflated a little using the Transform Tool under Edit mesh.

Part 2- UV / TEXTURINGUVing the meshes is pretty simple, just Planar Map the objects then use the Unfold Tool to relax them if needed.
Map the retina mesh onto the pupil part of the iris texture so it has a blackish color. It is important to UV map the sclera and cornea in a way that allows more resolution near the front of the eye as this is the part that will be seen most, a simple soft select and scale can create a nice soft transition.

For the cornea layer I like to create a height map from my sclera texture to generate a normal map so you can see the subtle breakup of veins on the sides of the eyes. You can sculpt this part in ZBrush but its such a slight effect I find using something like Knald or Quixel works well enough.

The next part involves creating a normal map from the iris displacement texture for Marmoset Toolbag to use. Import the XYZ MultiChannel Iris into ZBrush, then apply it to a square plane with 0-1 UVs. Crease the mesh and subdivide it until you have enough polygons to support displacing the surface. I tend to convert the texture to a mask using mask by color, then with that mask I use inflate under the deformation tab until it looks good. Once you have finished displacing the iris texture bake it to a normal map using whatever method you prefer.

Part 3- RENDER SETTINGSFor the best final result we are going to have to go into render settings in Marmoset Toolbag to turn some features on like:
|
I see a lot of artists cranking up the brightness on all their lights or HDR when what they really should be doing is looking at the exposure of their camera much like in real life.
Turning features on like GI, Local Reflection and increasing the Occlusion Detail will make certain shader features such as caustics more effective giving a more accurate result overall when it comes to the lighting in the scene.
The reason for doubling the Resolution is to improve the look of the alpha on the sclera material but isn't strictly necessary. Changing the lens mm to 50 gives a more traditional portrait look.

Part 4- LIGHTINGNow we have our settings done we can move onto importing our meshes into the scene to start setting up our lights.
I like to keep my setups very simple with a spotlight for the key and another spotlight for a backlight/rim.
This is similar to a traditional 3 point light setup but instead of a fill light we let the Sky do the rest.
I keep all the brightness settings on default except for the rim light which should be cranked to around 100.
Play with the spot angle and turn on contact refinement, this will be useful later when you will want the sclera to cast a shadow onto the iris creating the dark ring around it.

Part 5- MATERIALSNow it’s time to start looking at our three materials for the scene!
|
Apply a soft dithered alpha to cut out where the iris and retina will be and reduce all reflection including fresnel to 0. Apply the normal map we created from the sclera texture to perturb the surface slightly simulating veins on the sides of the eye. Then apply a refraction function playing with the Index of Refraction value. In an offline renderer you would normally set this value to 1.336, however in Marmoset simply look at the eye from the side and play with the value until it bends the iris all the way to the edge of the cornea. The next step is adjusting the Caustics value, this is what focuses the light onto the iris giving it a feeling of being alive. I didn't use any real world values for this either just played with the slider until I was happy with the result. |
 |
 |
Here is a breakdown of the values that worked for my scene:


| We would like to thank Alfred for his helpful contribution. If you're also interested to be featured here on a topic that might interest the community, feel free to contact us! |