


Ubisoft Beyond Good and Evil 2
Started in 1994 as a graphics studio, Ubisoft Montpellier merged with Tiwak Studio and developed such critically acclaimed games as Beyond Good and Evil® and Rayman® Origins. The studio brought its technical and creative expertise to several projects, such as Peter Jackson’s King Kong, Tom Clancy's Ghost Recon® Advanced Warfighter, Rabbids Go Home®, Michael Jackson: The Experience, The Adventures of Tintin: The Secret of the Unicorn, and From Dust®. The release of ZombiU™ for the Nintendo Wii U™ console continued the studio’s upward trajectory. In 2013, Ubisoft Montpellier released a new opus, Rayman Legends, as part a new entry in one of the studio’s most beloved brands and an eternal fan-favorite.
Using UbiArt Framework, an engine developed at Ubisoft Montpellier, the studio released Valiant Hearts: The Great War, awarded most innovative game at 2014's BAFTA awards. After working in collaboration with Ubisoft Montreal on Assassin's Creed® Unity, then with Ubisoft Quebec on Assassin's Creed® Syndicate, and finally with Ubisoft Paris on Tom Clancy's Ghost Recon® Wildlands and Tom Clancy's Ghost Recon® Breakpoint, the studio is now focusing on the recently launched Space Junkies (VR), as well as the highly anticipated game Beyond Good and Evil® 2.

Beyond Good and Evil 2
First announced at E3 2017, Beyond Good & Evil 2 marks the return of one of Ubisoft’s most beloved games. The prequel will transport players into a profoundly multicultural world, capturing the spirit of the original with unforgettable characters, grandiose decors and intense dramas that play out across System 3. Players will rise from lowly pirate to legendary captain at the helm of massive star-faring vessels, adventuring alongside crews of unforgettable characters to fight for freedom and the right to determine their own fate among the stars. Ubisoft Montpellier is developing the game alongside its community of fans via the Space Monkey Program.
About Pascal ACKERMANN
Pascal joined Ubisoft Montpellier Studio in 2015 and started working on creating NPCs for Assassin's Creed Syndicate.
Today, Pascal is applying his skills to Beyond Good and Evil 2 as Senior Character Artist. He is part of the team that has brought to life fantastic characters such as Knox, Jade and Pey’j.

What was the typical workflow for the main characters you worked on?
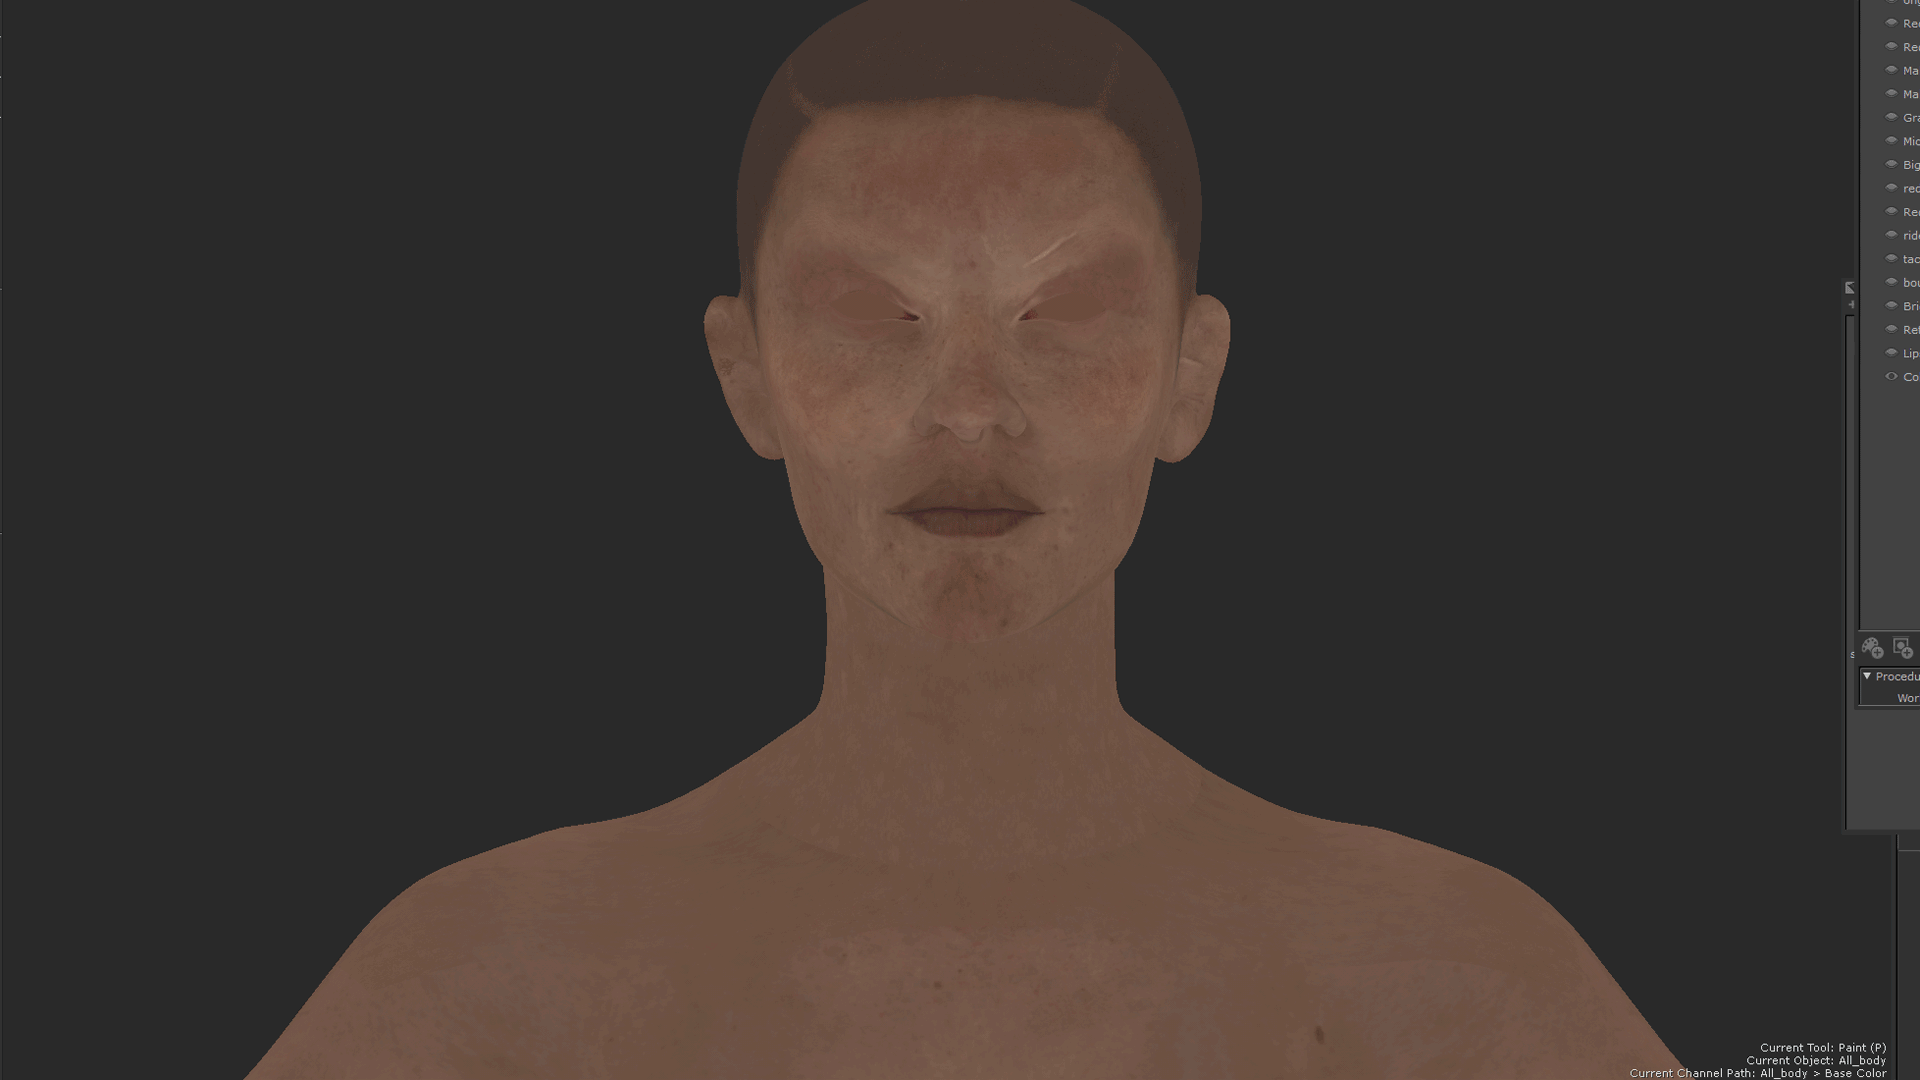
First, you need to know is that this character is special for us and was done in an unusual way . We produced it to benchmark quality for the game and were looking to create a CG-like character.
This space pirate is a character who brings together our creative guidelines and visual quality in a compelling way.
Before starting production, we needed to work on some new skills and build the character pipeline. Working with Unit Images allowed us to analyze how they worked and we were then able to adapt these same tools in order to create this character. This was a very exciting part of the process for me!
Next, we also had to think about how we were going to use these new tools and integrate them into the studio’s production processes.
Because our workflow was not yet defined and we were still in R&D phase, our concept phase need to be as accurate as possible. Thanks to the team’s Associate Art Director, Guillaume Arvieu, we were able to work from detailed concept art and mood boards, such as this one:

Next, I used these visual inspirations to create a first iteration for the 3D model in Zbrush. The character’s clothes were created using Marvelous.
Once the first iteration was done, I got to work modifying the character’s outfit and silhouette in order to make it more dynamic.
Reshape Process:

I was now able to focus on the details.
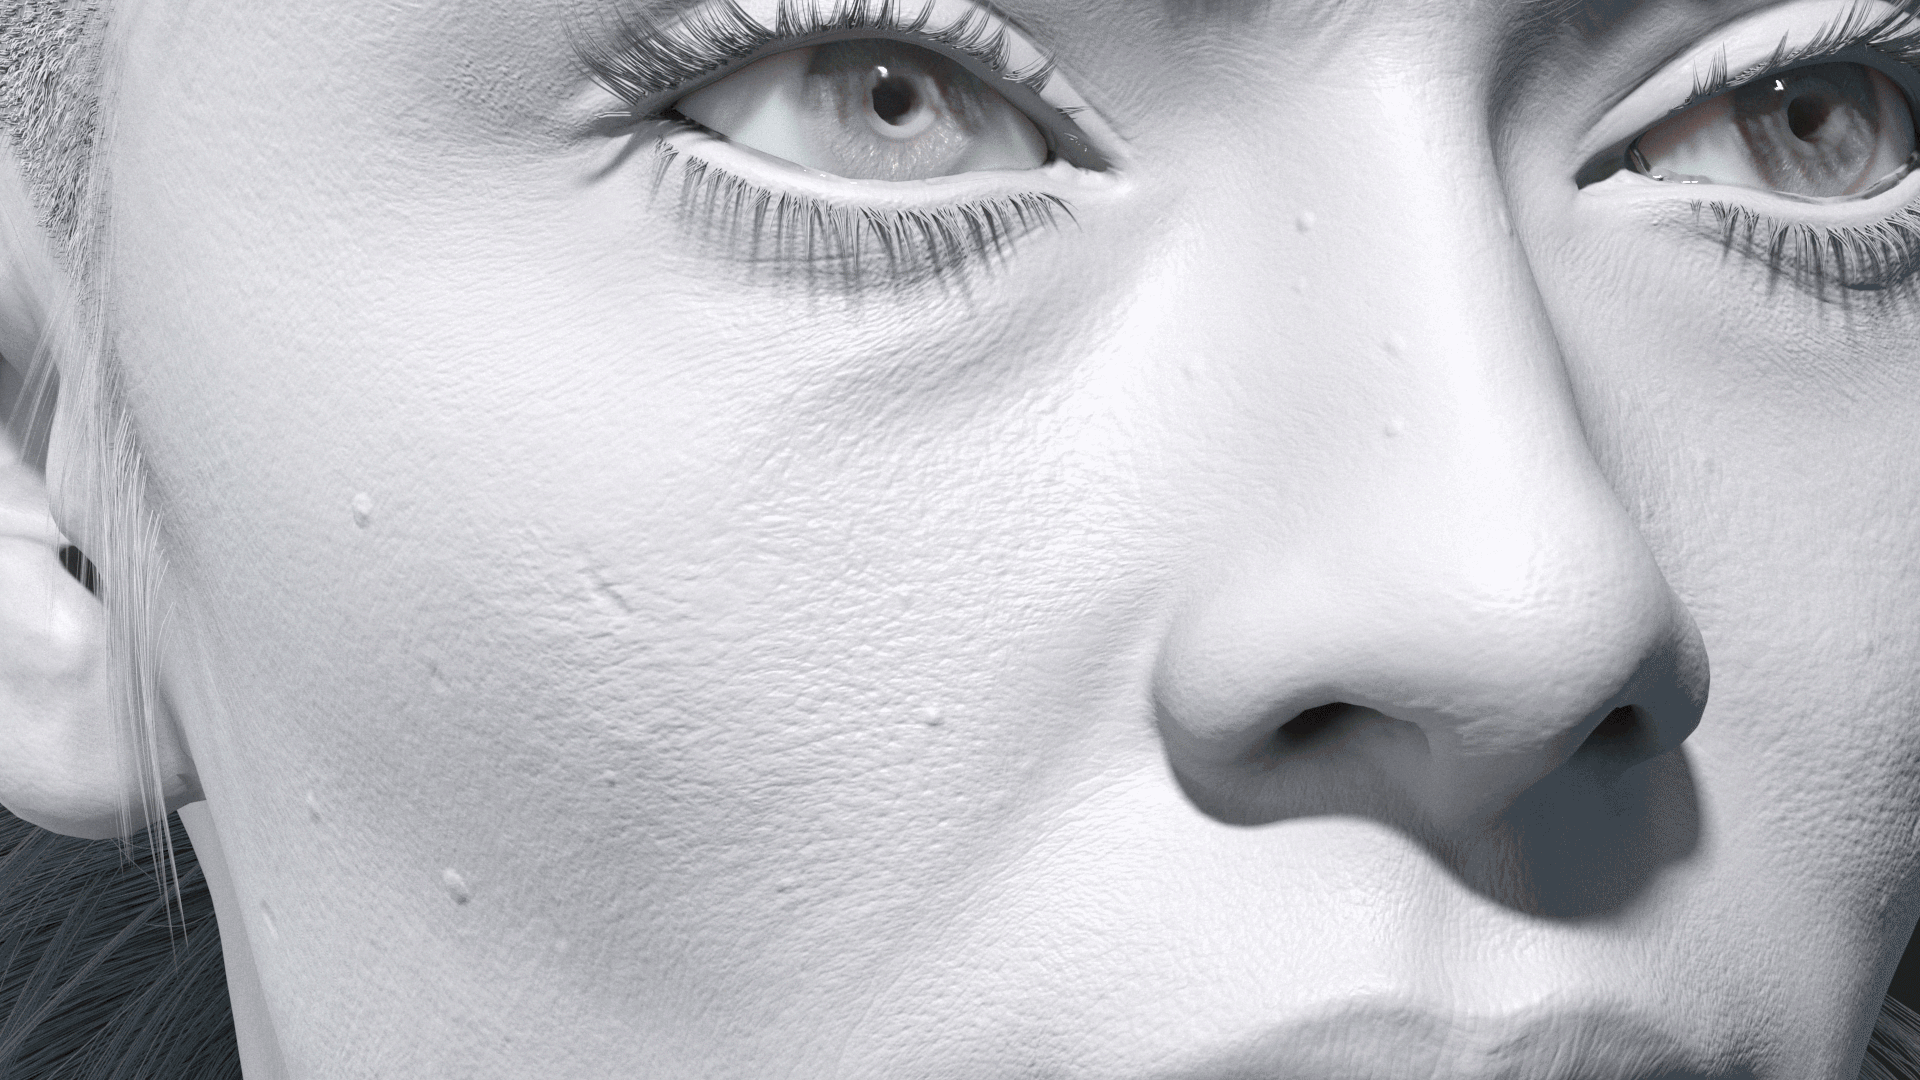
When I started to work on this character, the Multi-channel Faces from Texturing XYZ had just launched. Using this new tool was an obvious choice for me because it’s really easy to work with, not too complex, seamless and only requires Photoshop!
At first, I was hesitant to jump into Texturing XYZ and Mari to make my displacement map because it required learning a new software.
But with the MultiMap channel, the process is really fast and easy. There’s not only your displacement map, but also albedo, specular, hemoglobin and melanin maps!

To use the tool with Zbrush:
First, clean your model. If you use a scan, delete all the details.The displacement map is split into 3 maps: secondary, tertiary, and micro-details.
I suggest setting it in layers in Zbrush, that way, you will be able to tweak more easily.

Next, I jumped into Mari for the cleaning step. My albedo map was from multichannel on the head and scan texture for the body, so I needed to have a clean version with no visible seams in my maps.
Mari is the perfect tool for that. You have the same tools as you find in Photoshop, but you’re working in 3D!
In real time, we can have 2 texture sets, one for the head and one for the body. In Mari, you can import these as 2 UDIMs, and paint seamlessly between them.
For the final result, all the channels get matched together thanks to the multimap channels.
Character evolution:

To achieve the desired level of realism, we implemented data from scans.
Here you can see on the left the first rough version, then the scanned one, and lastly the final version tweaked by hand.
How long did it take to make a character from start to end in this particular production?
This character took me 3 months to complete, including the training stage for the various software. It’s not quite finished yet since we now need to transpose this character into the game engine and define the new pipeline of production.
What tools from CGI could you use in realtime ?
Ornatrix is a powerful grooming plugin dedicated to CGI, and it also allows you to produce hair cards with it. Thanks to the mesh from strands modifier, you can generate a mesh with UVs.

Mari can also be implemented to texture the skin, and it’s especially useful for painting tattoos between seams, as we can see in this example:

It was a lot of fun creating this character! Learning new tools, as well as seeing how others in the CGI and FX industries work, helped us to think about how we could achieve the “best of both worlds” and be able to create the character just as we had imagined. We still have other challenges that await, such as transferring this work into our real-time pipeline, but I can’t wait to play this character in Beyond Good and Evil 2!
| We would like to thank Pascal for his work and helpful contribution. If you're also interested to be featured here on a topic that might interest the community, feel free to contact us! |