


Mohsen Rezaei / Making of Charlize Theron Likeness
I'm Mohsen Rezaei, currently working as freelancer character Artist/digital Sculptor. In This article, I want to show how I used 175 Skin Alphas from Texturingxyz for detailing of my Charlize Theron Likeness.

Chapter 1: Texturingxyz Alphas
Texturingxyz maps is the most amazing alphas you can find out there, the amount of details and variety on them is truly incredible thanks to people at Texturingxyz who used the most high-end cameras and gears to capture the finest amount of details possible, truly amazing job.This product contains 7 pack of alphas, 5 female and 2 male at different ages, each pack comes with about 30 alphas, all the alphas is 16 bit and with the resolutions of 2k, 3k, and 4k.


And also you can find a guide map for each pack which helps you easily find the right alpha to use! See the example below:

Chapter 2: My thoughts on Texturingxyz Displacement maps
Texturingxyz displacement maps were the first products of Texturingxyz, these are very high quality and high resolution scans of people’s face, which comes with 3 maps, Displace, Tertiary and Micro maps in about 20K resolution.
Using these maps makes the detailing process faster, so a lot of studios use these maps and get stunning results in short amount of time.
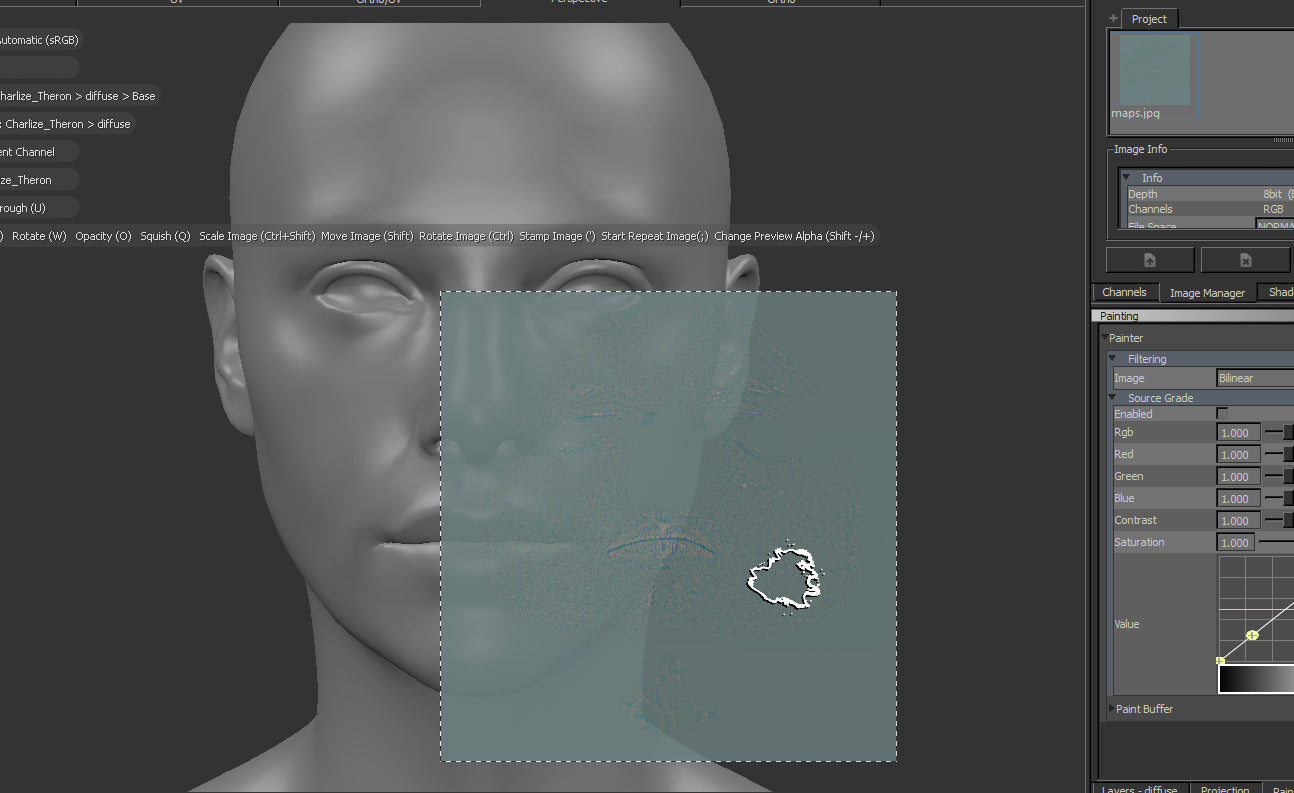
You can’t use these maps directly in ZBrush, you need to first project them on your model in a software like Mari then you can import the projected maps separately in layers in ZBrush.
In order to project all of these maps once, first you should put each one of them separately in RGB channels using a software like Photoshop or Nuke.
Then import it in Mari image manager and start projecting.
Chapter 3: Basemesh
Having a good base mesh with nice topology is very important to get good amount of details in ZBrush, cause you wanna subdivide your model a few times to get good amount of density on your model like my Charlize Theron model subdivided to about 8 millions of polys, a bad base mesh is one that comes with not equally distributed mesh, what I mean is that even you have your model subdivided to millions of polys but there are some areas that you can’t get sharp and crisp details out of your alphas due to bad topology.

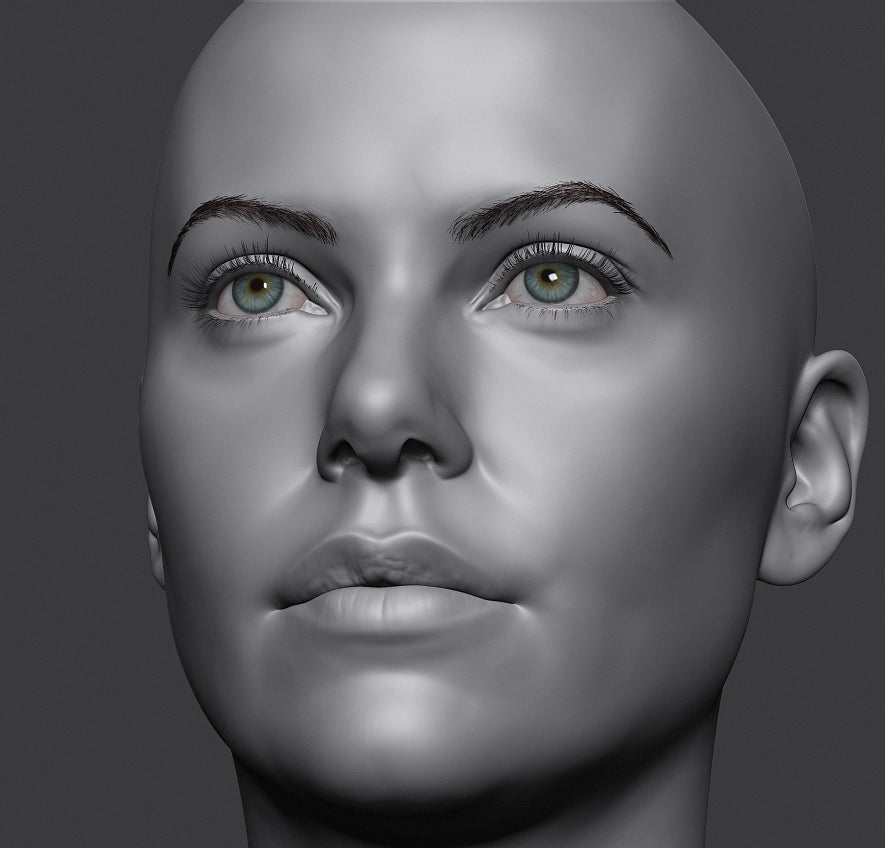
Chapter 4: Primary and secondary forms
Make sure you got nice forms before jumping to the details, this is very important, cause these are all working together so bad forms with good details won’t work and you won’t get something beautiful and vice versa. I personally spend a lot of time having fun with secondary shapes and try to get nice and beautiful shapes before start detailing, but even after detailing I try to get my forms and shapes stand out again and will work on top of them.
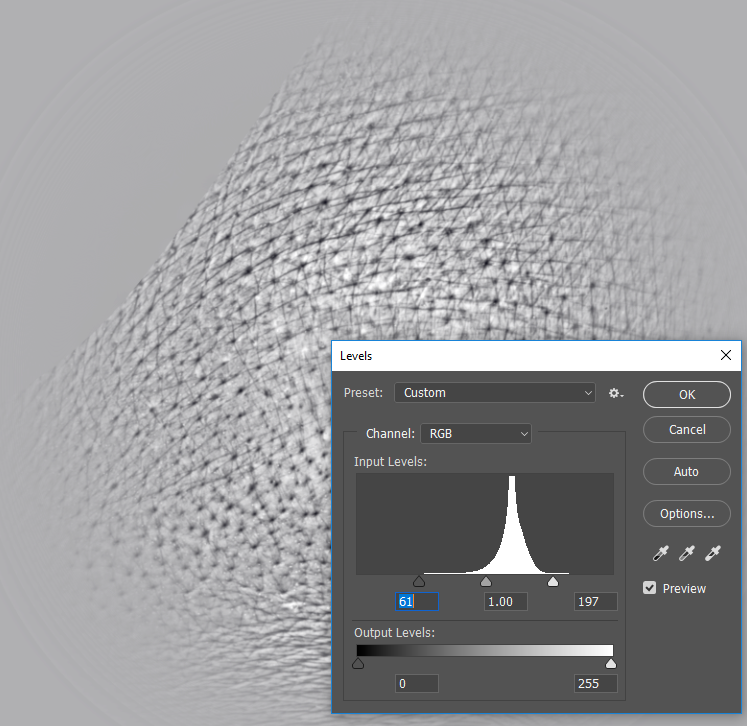
Chapter 5: Preparing the alphas (optional step)
Before using these alphas in ZBrush you can reveal even more details by playing with contrast and levels in Photoshop.
Just play with those sliders to reveal some more details and increase contrast a little bit too.
Chapter 6: Importing the alphas
Import the needed alpha in ZBrush based on guide map.

Chapter 7: Brush Stroke
Select the standard brush and set the stroke to "DragRect"

Chapter 8: MidValue
Set "MidValue" in modify section of Alpha panel in ZBrush to 50, so you won't end up having some unwanted changes on the volumes of the model.

Chapter 9: Layers
Create the first layer in ZBrush using that plus button in "Layers" section.

Chapter 10: MorphTarget
Before using the brush to apply the alpha you can use Morph brush in ZBrush to have good control over the alpha.
But to be able to use morph you should first store the morph target, so to do so, press "StoreMT" in Morph target panel

Chapter 11: Applying the Alphas
Select the prepared brush and drag the alpha pore in the right place, Pay attention to the direction of the alpha and place it carefully in the right area, what you should keep in mind is the directions of these alpha, these alphas is not generic alphas where you can use everywhere that you want, you should use a lot of references to be able to apply all the alphas in the right way.

If needed rotate or flip the alpha in alpha panel to drag it easier.

Chapter 12: Tips for applying the alpha pores
Don’t zoom in too much on model when you're applying the alphas, so you don’t end up facing the alphas in wrong scaleFrom time to time zoom out and check the alphas directions, scale, and intensity.
Always use Morph and Morph Brush to control the alpha this is very important, because sometimes there is some unwanted info’s on alphas that you don’t want, you can easily wipe them out using Morph tools in ZBrush.


Chapter 13: Hand details
Human skin is not flat, there is a lot of imperfections on top of it so sculpt a lot on top of the alpha layer in the next layers to add life to your model. So After applying the alphas in the first layers i improve the details by working on top of them and add some hand sculpting details in the next layers.

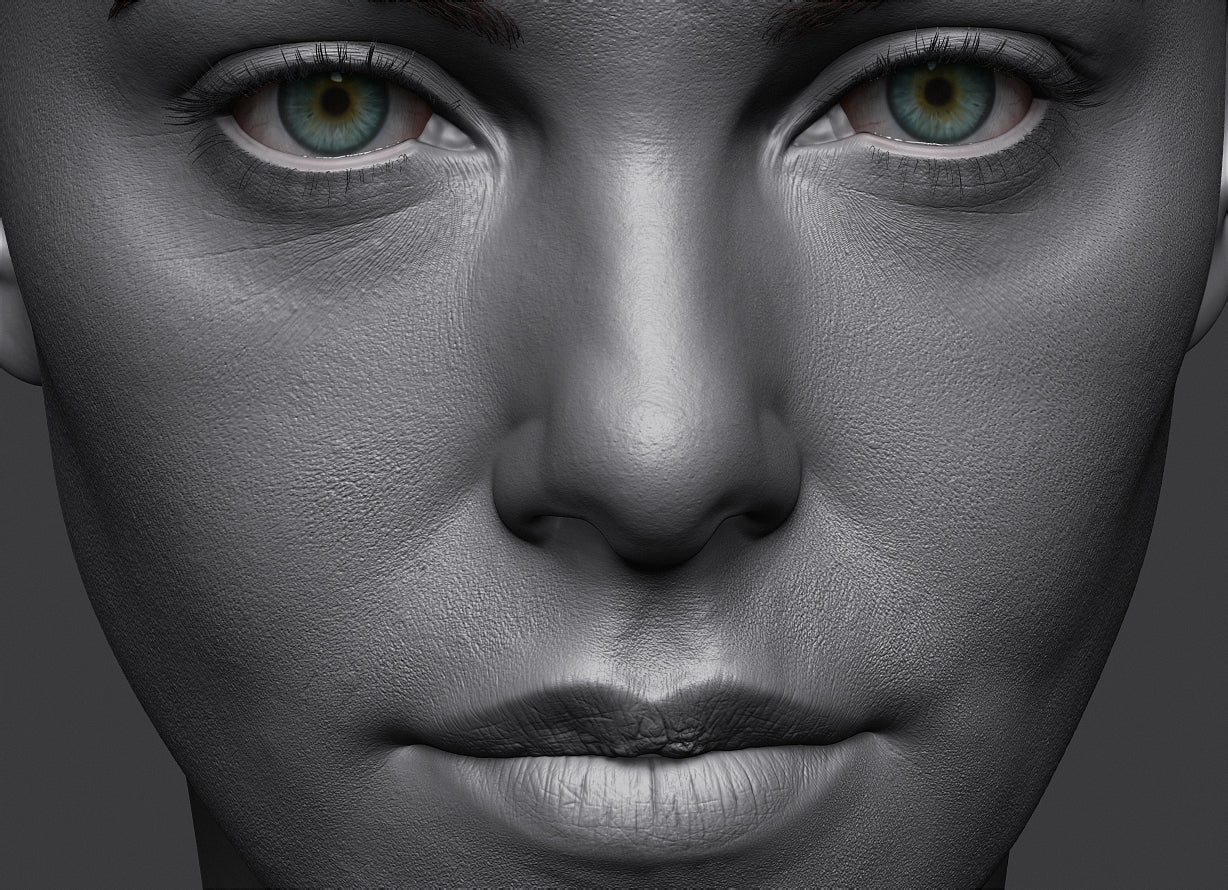

As you can see adding things and sculpting on top of the alpha layer helps add that natural feeling more and more, so always keep doing this in next layers also to finally make the skin feel like skin actually.
Use dam standard brush for lines and wrinkles control them using morph target
Use a standard brush for adding details like pimples, blemishes, etc.
Use spray stroke for standard brush and dot shape alphas like "alpha 40" in ZBrush to spray the details.
Work on secondary forms shapes also in separate layers after you added the details and make them a little bit stronger sharp.
Try to have a good balance between alpha layer and the other layers by changing the intensity of the layer or using Morph brush.
If you didn't find a specific alpha for a specific part of the head to fil the area just find something that feels good and natural from distance, it's about having a good feeling and also good balance between all the parts.

artstation.com/mohsen
facebook.com/mohsen.rezaei2
instagram.com/mohsenr3d
| We would like to thank Mohsen for his helpful contribution. If you're also interested to be featured here on a topic that might interest the community, feel free to contact us! |