


Marlon R. Nunez / Making Of Gandhi
Marlon R. Nunez / Making of Gandhi
SOFTWARE USED: Zbrush, 3DsMax, MARI, V-ray, Marvelous Designer

Introduction
Marlon R. Nunez is a Character Artist working in the CG industry since 2010. He has a vast experience working in different sectors: Videogames, VFX or 3D printing.
"In 2016 I knew was the year to get a better worflow in terms of realism.
First time I saw the displacment maps from Texturing XYZ, I knew those were the key to accomplish that. The workflow is extremely easy and the results speak by itselve"
For the Gandhi project I used Zbrush, Mari for textures and 3DsMax / Vray for rendering. It was a learning project for me, and a very good experience I would like to share with you.
I will explain my worflow using the displacement maps in Zbrush and MARI in this tutorial.
The most important in any character is to get the base mesh right, to get this I never get higher from
Part 1- Modeling
lv 4 in Zbrush. Any higher level are high frecuency details and that is other part of the job.

(As Gandhi has a quite large nose, I wanted to avoid streching issues on the textures,, so I set the seam vertical across the face.)
Part 2- TexturingXYZ maps preparation Workflow
To use properly the displacement maps you will need to merge those into Photoshop. Take in mind the files are quite large.

I used Male_fullface_40s which fits my needs in terms of high frecuency details. Make sure you merge all the maps provided by Texturing XYZ into a single PSD file (16 bits) and fill each of them into the RGB channels. I usually like in this order:
R: Displace (later on I will call it Primary)
G: Tertiary (later on I will call it Secondary)
B: Micro (later on I will call it Tertiary)
Now in Mari, I loaded all the files into the Image Manager and with a soft brush I painted all the details in the face area. Once is done, I always place a Color Switch adjustment layer, so I can control which channel I will be exporting later on: Red (Primary), Blue (secondary), Green (tertiary)

Back in Zbrush, I use next worflow:
1. Load them as Alpha > Invert in Vertical as Zbrush flip them during export.
2. Load the alpha in the displacement.
Adjust the value, most of the time low values around 0,3 do the job.
3. Create a layer and bake the information from each Channel into separated layers (Primary, Secondary, Tertiary).
4. Adjust each layer until it looks right.
5. Create any new layer for imperfections, wrinkles and extra porosity details.
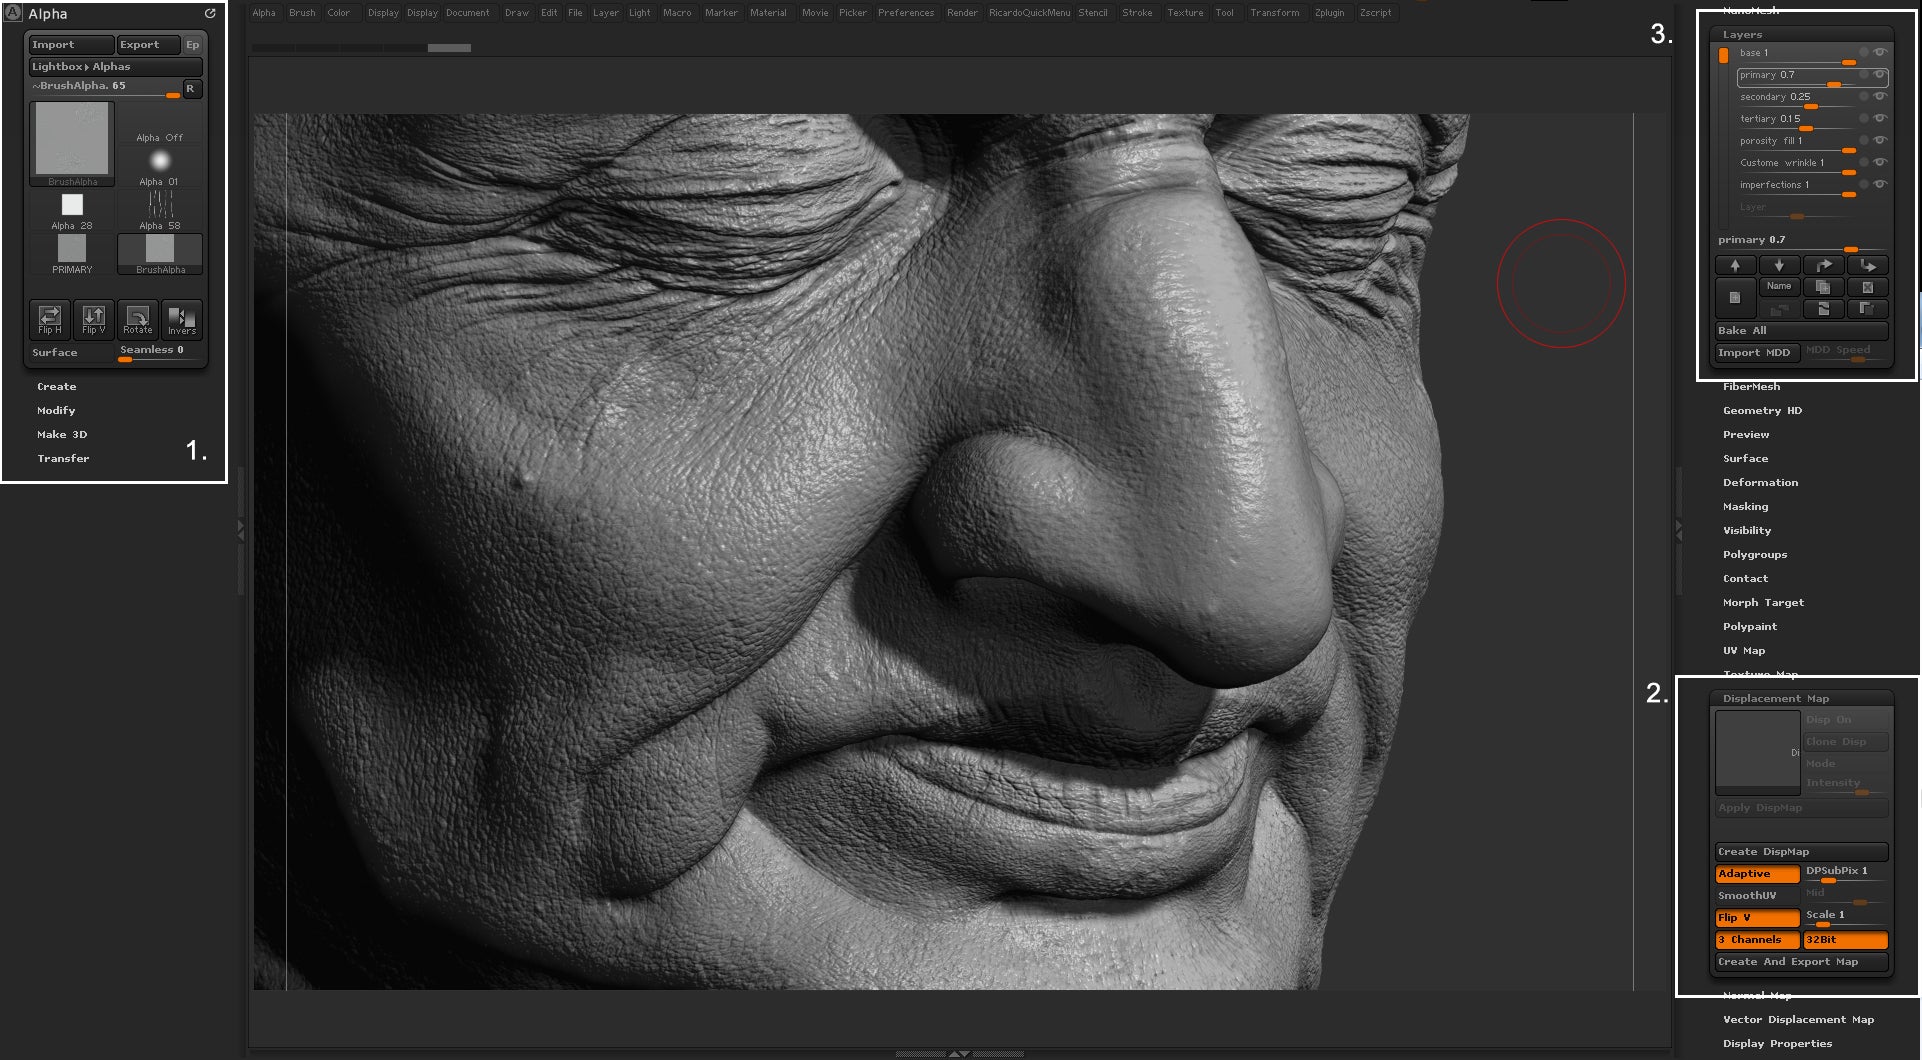
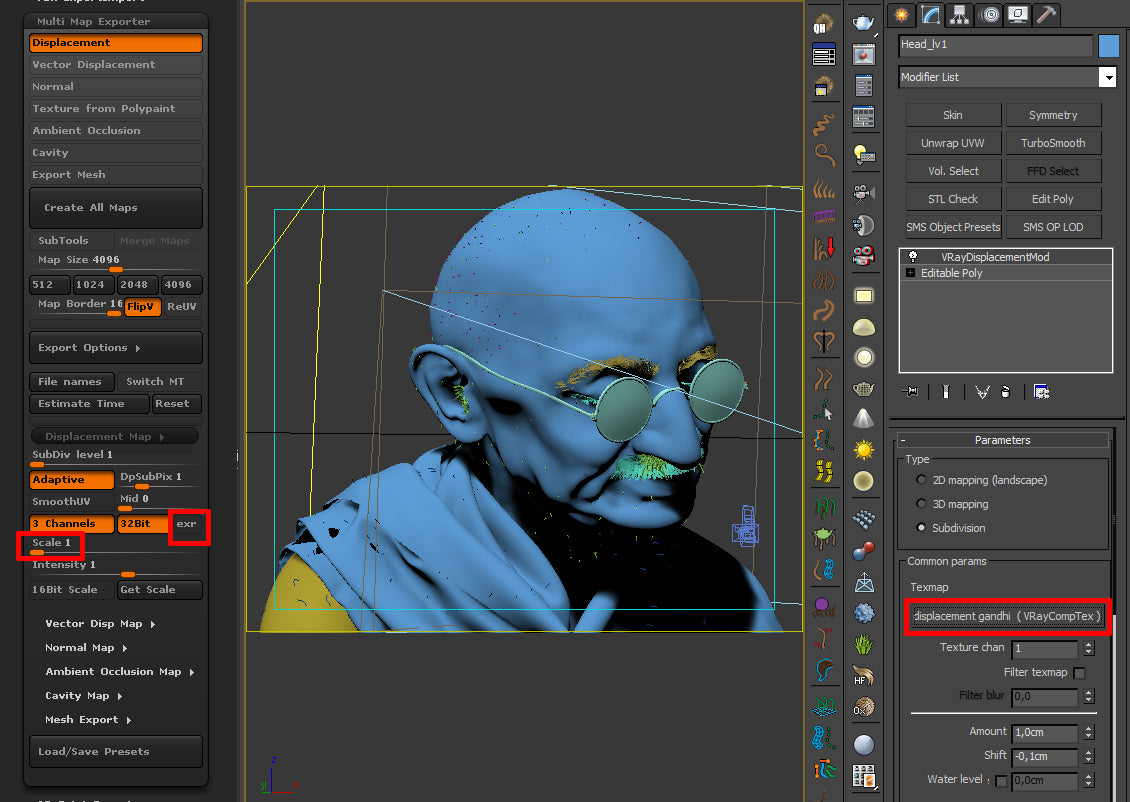
Once you are finish, in order to bake the displacement map I use Multi map exporter inside of Zbrush. Make sure you turn OFF EXR and the scale is set to 1.
With the displacement map baked, in 3DsMax I add a VrayDisplacementMod on the lv1 OBJ imported from Zbrush. An amount of 1cm should do the job, though depending on the case I like playing with the SHIFT value too.
Part 3- Albedo Skin Procedural Workflow
The skin is painted in MARI with a procedural workflow (see image below)

The process is very simple. I create a procedural layer, fill it with 2 colours and add a Mask Stack, which also includes several procedural layers. The reason why I used procedurals is because the paint look more organic and caothic, exactly as skin is. Full of imperfections and different tones.
The second reason why specular is the right workflow is because I could reuse those layers in the body channel. So I didn`t have to paint it from scratch.
Part 4- Shading & Rendering on Vray
The Vray Skin Shader took me several months of trial and error. The trick is to recreate the specularity and any hightlight out of the main SSS shader. For that I used several
VrayBlendMaterials that using them correctly I could simulate the skin and specularity more realistic.
Also was very important to use as less texture sources, so the skin can be achived faster. I used a SHALLOW COLOR, SPECULAR, DISPLAECEMENT AND A SCATTER RADIUS textures. Just shallow color was done in MARI, specular and te scatter radius was done in photoshop.


