


Making of Joel
Hello there, I'm Sefki Ibrahim, a 3D Character Artist specializing in the creation of digital humans.
This project involved a partnership between Vimal Kerketta, the sculptor responsible for crafting the likeness of Pedro Pascal as Joel from The Last of Us, and myself. As part of this collaboration, my role covered everything from texturing, grooming, and look-development to the production of final renders using UE5.
Now, let me break it down for you.
I like to collect as many references as possible to aid me in texturing, grooming, look-development and lighting. Here are some of the reference images I used in the project using PureRef.


Wrapping VFace to metahuman base and transferring textures
I went with the Metahuman topology/UVs for this project because I had UE5 in mind for the final outcome. This way, I could tap into the pre-existing Metahuman textures and shaders in UE5, making things smoother. After I wrapped the Metahuman base onto Vimal’s sculpt using Wrap and tidied it up, I did another wrap, aligning the VFace topology with the new Joel base.
Before projecting the textures, I first took the wrapped mesh over to ZBrush for a cleanup session. I made sure to project and smooth out any artefacts, ensuring the best possible match.
Back in Wrap, I projected and exported all of the maps, including albedo, displacement, normal, cavity, and utility maps.

Texturing
I brought all the textures into Mari as 32-bit EXRs. From there, I added layers to the texture maps to address any required touch-ups. In particular, for the albedo map, I applied paint-over adjustments to better capture the likeness as per the reference images.

To prepare the ZBrush displacement, I dedicated some time to working in ZBrush. During this process, I projected essential details from Vimal's sculpt and made minor adjustments to ensure a precise fit for the eyeballs within the sockets.

I generated a normal and displacement map for UE5 and Arnold renderer with these settings.

I'm way more at ease with offline rendering, so I spent a good chunk of time running test renders in Maya and Arnold to check if the textures were nailing that likeness. Once I had something solid in hand, I knew I'd be all set to get the character ready for Unreal Engine. Here are some initial skin texture tests in the Arnold Renderer.

Groom
I recorded the grooming process for YouTube, which you can watch here:
Vimal crafted a groom sculpt that I employed to establish an initial set of guides. After that, I dedicated time to refining the groom’s appearance, using references to ensure the volume looked good from various angles.

The grooming, shirt and overall look-development were completed in Arnold.

Importing into UE5
Preparing the model for UE5
I made sure to utilize the geometries linked to the Metahumans for optimal results in UE5. Specifically, Metahumans come with two handy eye geometries (eyeEdge and eyeShell), both of which I aligned with the character’s eyes.
To facilitate the process, I exported Joel's head, eyes, eye edge, and eye shell as an FBX. Likewise, the shirt, buttons, and stitches were exported as a separate FBX file, and these were subsequently imported into UE5.

Exporting the Groom
I used these steps to export my XGen groom to Unreal Engine.
- Select the descriptions. This example is for the hair, so I’ve selected all of the relevant descriptions associated with the hair groom.

- Go to Generate -> Convert to Interactive Groom.

- Select all of the relevant interactive grooms and again under generate -> cache -> create new cache with these settings:

Once imported into UE5, I used these transform values to ensure the groom’s proper orientation.

Setting up
In Unreal Engine, I set up the project using these settings for optimum results.

I kicked things off by matching each component with its corresponding Metahuman material; for instance, I linked the eye shell to the occlusion shader. Then, I brought in all the textures I needed (as displayed below) and substituted them for their respective texture maps within each material.

In the skin material, I added another normal map input for the sculpted normal (the map I had exported earlier from ZBrush), which was combined with the XYZ Normal from the VFace pack.
Here’s a look at the material assignment for the head skeletal mesh:

To use the hair texture, I introduced a custom texture for the Hair Dye Colour within the hair master material. Furthermore, I adjusted the salt and pepper option to introduce some random white hairs into the groom.

How the hair texture maps affect the groom:
Shading the skin
My work began with the creation of a custom roughness map for the skin shader. Metahumans employ a somewhat unusual green map to control roughness, ensuring that the character's skin maintains a consistent sheen regardless of its distance from the camera. I selected this texture map and replaced it with my character's normal map, dragging it into the ‘Composite Texture’ slot.
For those not utilizing an existing Metahuman material, this map essentially consists of a plain black texture with a composite normal map set to 'Add Normal Roughness to Green.'

Making use of material functions provides a great way to fine-tune the look of the skin. I added this node setup to various parts of the skin shader, such as roughness, specularity, normals and subsurface amount.
These material functions serve as a layered mask system, allowing you to dial different regions of the face on the fly, without the need to switch between Photoshop and UE5 constantly.

Here’s a snippet of the network. I added the material function to the master head material, giving me this result in the material instance.


I dedicated time to fine-tuning the Subsurface Profile and the transmission/opacity map. This map controls the extent of subsurface scattering the skin undergoes, with white indicating the full subsurface effect and black representing diffuse or no SSS.


I introduced an additional texture slot into the network within the master head material, which allowed me to incorporate the sculpted normal map exported from ZBrush. Then, I adjusted the intensity of the sculpted, XYZ, and micro normals until I achieved the desired outcome.


I added the cavity map into the cavity texture slot within the Specular section of the shader. As shown, a material function was integrated, similar to the roughness, enabling adjustments to the specular response in different facial areas. In the context of real-time rendering, where the skin's surface isn't actually displaced by a displacement map, the cavity map plays a crucial role in enhancing the skin's appearance and emphasizing the depth of the pores.

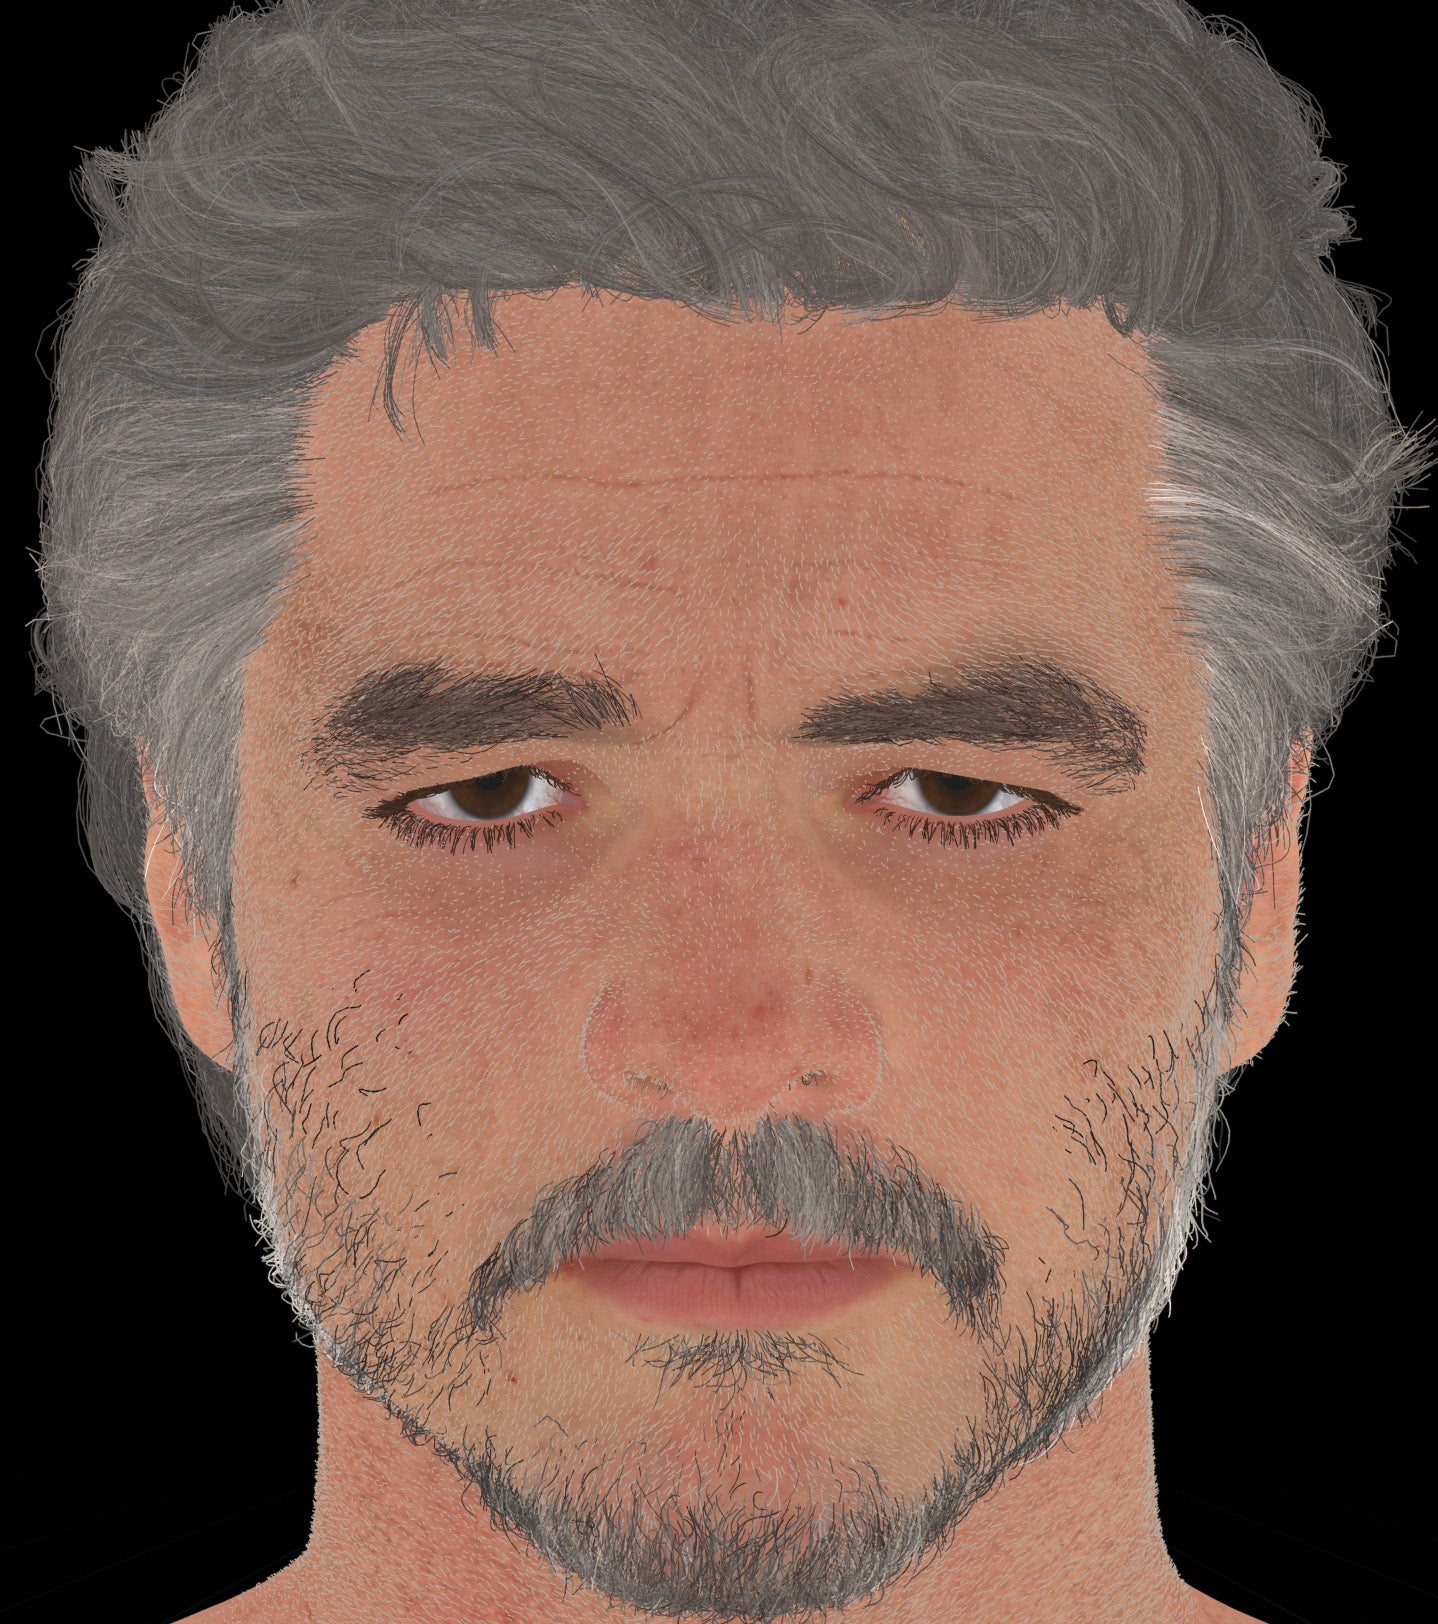
Final textures.

Rendering
After fine-tuning the shaders to achieve the desired outcome, I dedicated some time to establishing the ultimate lighting and camera configuration in the sequencer. I set up one for the final still portrait and another for the cinematic video animation. For the portrait, I employed a spotlight and rectangular lights, making sure that "Cast RayTraced Shadows" was enabled in all the lights to ensure realistic shadowing.

Final portrait lighting.

Finally, I set up an array of console variables to ensure the highest quality export from UE. Here’s a look at the variables I used.

And here’s the final animated sequence!
Thank you for looking!