


BRAV FG / TEXTURING A REALISTIC FACE FOR REAL TIME RENDERING INSIDE UNREAL ENGINE 4

My name is Braulio “Brav” FG and I'm from San Jose, Costa Rica. In this article I’m going to talk about the use I gave the textures from TexturingXYZ when creating a realistic face for real time rendering inside Unreal Engine 4.
Textures Used
First of all I want to thank David Marmor for providing the base model and primary blendshapes for creating this project. This base model didn’t have any UVs, texture or details whatsoever, just a plain gray default material, so this allowed me to create almost any look for the face. So from the start I wanted her face to look real, not with a smooth perfect skin, but with pimples, moles, imperfections and some sign of aging, but still feminine, with her glossy lips and makeup.
In order to achieve this, I turn to TexturingXYZ´s resources, specifically the “Female Full Face 20s 01” to create the displacement and for the color I use two set of textures, one female, the “Female Face 20s Fullface 06” and one male “MaleFace 18s Full Face 04”. I used two textures because both looked young but ironically the female had a more harsh skin and the male had a more soft skin, so that was a perfect balance for what I was trying to achieve.


UV Mapping
The software I used for doing the entire UV mapping was UVLayout, and this time I try something different, I decided to split all the different parts of the face accordingly to the division of the TexturingXYZ´s textures. So, for example, the forehead is one UV shell, the nose is another shell, the cheek another one, and so on. I did it this way so each part had more UV space and texture resolution. The downside to this method is that you end up with a lot of seams throughout the face, so you got to be extra careful when texturing later on. Here you can see how I decided to layout the UVs, each color represent a different UV shell.

MARI Projection
So after the UVs were completed, I then use MARI for all the texturing projection. First I did the displacement projection, I wanted the displacement map to guide the way for the color map, to have a foundation in which I would then later on create all the other maps. I wouldn’t recommend projecting the color first and then try to match the displacement. Both the displacement and color maps were projected into an 8k resolution patches. Once these two textures were completed, I was able to create the rest of the textures like roughness, specular, ambient occlusion, etc. Also using different reference photos I use the same method to project the textures of the inner parts of the mouth like the teeth, tongue, gums, etc.


Zbrush
Having the displacements maps separated in MARI was crucial, as I then moved to Zbrush to embed the details onto the mesh and also to create extra details manually. Each map created in MARI was imported and put in a separate layer inside of Zbrush. When I project the details, I like to give a high value to the displacement, so the details are push real hard, and then with the slider of the layer I tone it back down to what I needed. At this point I already knew that I want three normal maps to use inside Unreal Engine 4, one secondary, one tertiary and one custom, so in Zbrush I set the UV maps to 8192 and then export all the maps separately as PNGs.


Unreal Engine 4
Unreal Engine doesn’t accept 8k maps by default, so in order to import these large files I had to change its configuration outside the engine. You just need to open the DeviceProfiles inside your project at the path: “nameofproject/ Saved/ Config/ Windows” and change every MaxLODSize to 8192 and restart. With that quick fix, then I was able to import 8k maps for both normal and color maps.


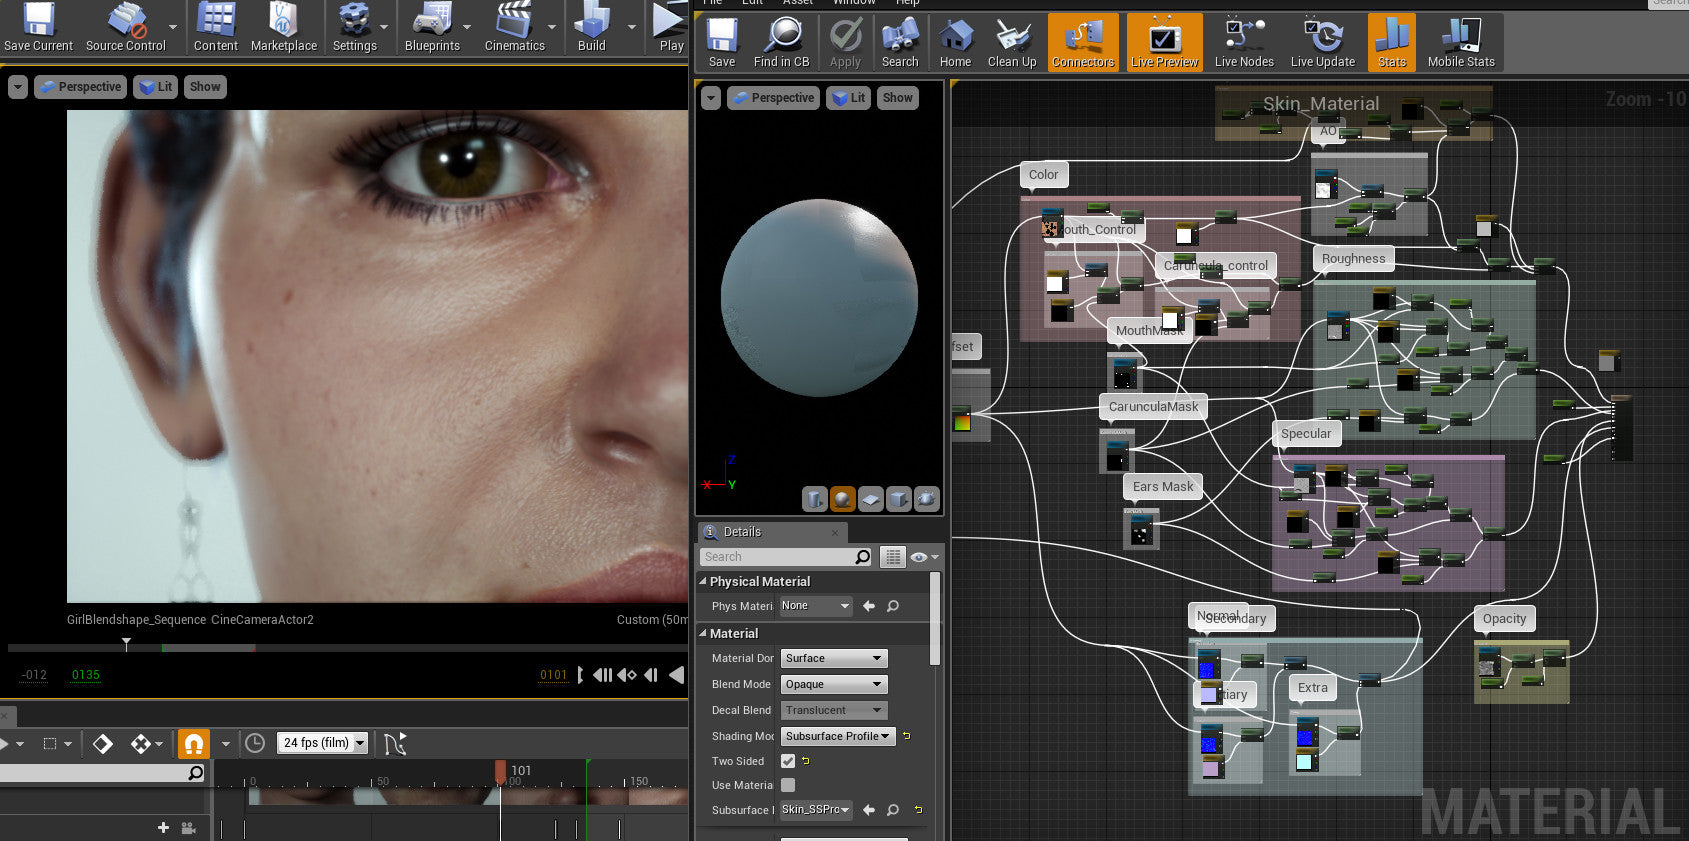
The idea of having three normal maps inside Unreal Engine was to be able to manipulate each level of details separately, the same way the layers inside Zbrush work. In order to be able to do that, I first need to blend all the maps into one single input, so I make use of the BlendAngleCorrectedNormals node to make that happen. Besides that, each map had its own Constant3Vector as a parameter exposure; I like to do it this way so I can control each channel separately as well. This method give me all the control I needed, without leaving Unreal and going back to Zbrush to work on the normal maps.

Here you can see how I can control all the maps and channels separately:

I decided to mix the color map with some masks created in MARI as well, in order to be able to control the mouth color and caruncle color separately. This was very useful because I could work with different color variations, without leaving Unreal Engine back to Photoshop or MARI. Also I blended the Color node with the Fresnel and Ambient Occlusion map, so I can control everything from the same output.

Using the color map in combination with the masks I can easily control different aspects of the face in real time:

Conclusion
The main goal with this method is to have control over every aspect of the face, without leaving Unreal Engine back to the editing software. So it can be very useful and time saving in most cases. Another goal was not only to show quality, but to see how a real time engine manages realistic textures and materials. Turns out that it handles it pretty well, running at 50-60 fps at 1080p having a very high poly model because is a test intended for cinematic quality. Probably a few years ago nobody would say this was possible.