Hi guys! My name is Sefki Ibrahim and I’m a 3D character artist. I’ve recently just finished a university course in Computer Animation and have been self-teaching 3D art for two years now. Before this, I studied Mathematics for 3 years and took a year off after graduating to rediscover my art. I stumbled upon 3D by chance as I was given some basic software by a family friend to play around with because I liked to draw and the rest is history. I haven’t stopped working on it since!
Since I can remember, I was always drawing people, but I really started focusing on photorealistic portraits from the age of 14.
I started out traditionally with a pencil and paper and a few years later started painting digitally in Photoshop.
It’s pretty obvious from these that I was always obsessed with details and getting the most realistic result possible, and this desire has since translated in 3D where my goal from the very start was to create the most realistic humans possible.

I am currently freelancing and working on some really exciting NDA projects; I feel lucky to have such great opportunities come my way straight after finishing my master’s course, including this one! Of course, the learning never stops and since aspects of the industry are always changing and growing, you have to keep your skill set up-to-date and never be too complacent.
In this interview, I'm going to be explaining my new process behind making the skin for my latest project, 'Digital Portrait' using Texturing.XYZ's multichannel faces.
Making of
First off, I used my own base geometry that I modeled a few months prior to this project and used the scan of Alex in Wrap 3 to wrap my base onto. I then exported this into Zbrush, projected the details from the scan and subsequently cleaned up any errors.
The next stage was to use Mari's transfer tool to shift the scanned diffuse map over to my model - this would act as my base diffuse. Areas like the eyelashes and the hair cap were removed.
The process for this project was inspired by the Foundry's talk on how they created the digi-double of Hugh Jackman for the film, Logan. I took what I could from the talk and tried to figure out the rest for myself.
Read the case study here.
To begin, I imported the displacement and utility map from the multichannel faces pack into Photoshop. The method I am using here is called channel packing, where I combine three maps via the RGB channels and consequently have one map to use for projection.
For this to work, the maps have to be grayscale in order to be added to the RGB channels. So, in Photoshop, I applied the 'black and white' filter to the displacement map and copied and pasted the image into the Red channel. With the utility node, I took the specular map, which is in channel B and the hemoglobin map in channel R, and copied and pasted these into the Green and Blue channels respectively of my new scene.
The result is the green map you can see below.
I then imported my base mesh into Mari - usually, the second subdivision because it holds a little more detail, which helps with seeing the details of the face better such as the lip line. I used the paint-through tool to project the green map onto the model, starting with a basic block-out and then refining as I go.
Afterward, the projection was cleaned up and I ensured that areas such as the inner mouth and eye cavities were cleaned. I utilized Mari's surface shader and applied the channel to the displacement attribute to check how the displacement map was looking. It's difficult to tell if everything is painted correctly when it's a color map, so this saves you from having to test it in Arnold and go back to Mari to make further changes.
Additionally, I made use of the copy channel layer, to analyze each individual channel - this is a good indicator of any errors in your projection. Once all was cleaned up and refined, I exported this map out of Mari at 4K resolution and into Photoshop for extraction.
The green map was then separated back into 3 maps. Creating new files for each, I am left with a displacement, hemoglobin, and specular map.
Diffuse map
The way I created the diffuse map for this character was by layering textures in Photoshop. I imported my scan diffuse map (that I transferred at the start of the process) into Photoshop and paste the hemoglobin map on top of this. Like the image below shows, I created another layer which was flooded with a teal color and was set to multiply. Both the color layer and the hemoglobin map were grouped and the group was set to subtract.
 |
This created the correct look for the hemoglobin map and also gave me control over how red I wanted the face to be by simply editing the color layer to variations of blue/green. Other layers added to the skin were coloration changes, darkening of the lips and eyes and a subtle veins layer that was created in Mari using tri-planar projection. |
Displacement map
I overlayed some alpha masks that I painted in Mudbox to prevent displacement details in some areas that felt too harsh and to ensure these areas would be totally clean in the render. It's hard to get the perfect result in Mari, so this was another way I amended the maps. The displacement map was flattened, converted to 32-bit and exported as an OpenEXR file.
When creating additional maps (specular, SSS, coat), I tend not to start until I've set up a basic scene in Arnold and go from there.
I used Arnold's ai Standard Surface shader and applied the diffuse map to the subsurface color, setting the weight to 1. Texturing XYZ has created a displacement map node network, which I applied to the mesh also. I tweaked it to look like so:
The sculpted displacement is added with the Texturing.XYZ displacement to produce these results. I used an ai Range to control the strength of the XYZ displacement on the model, this was set to 0.455 via the Output Max attribute.
Additional Maps
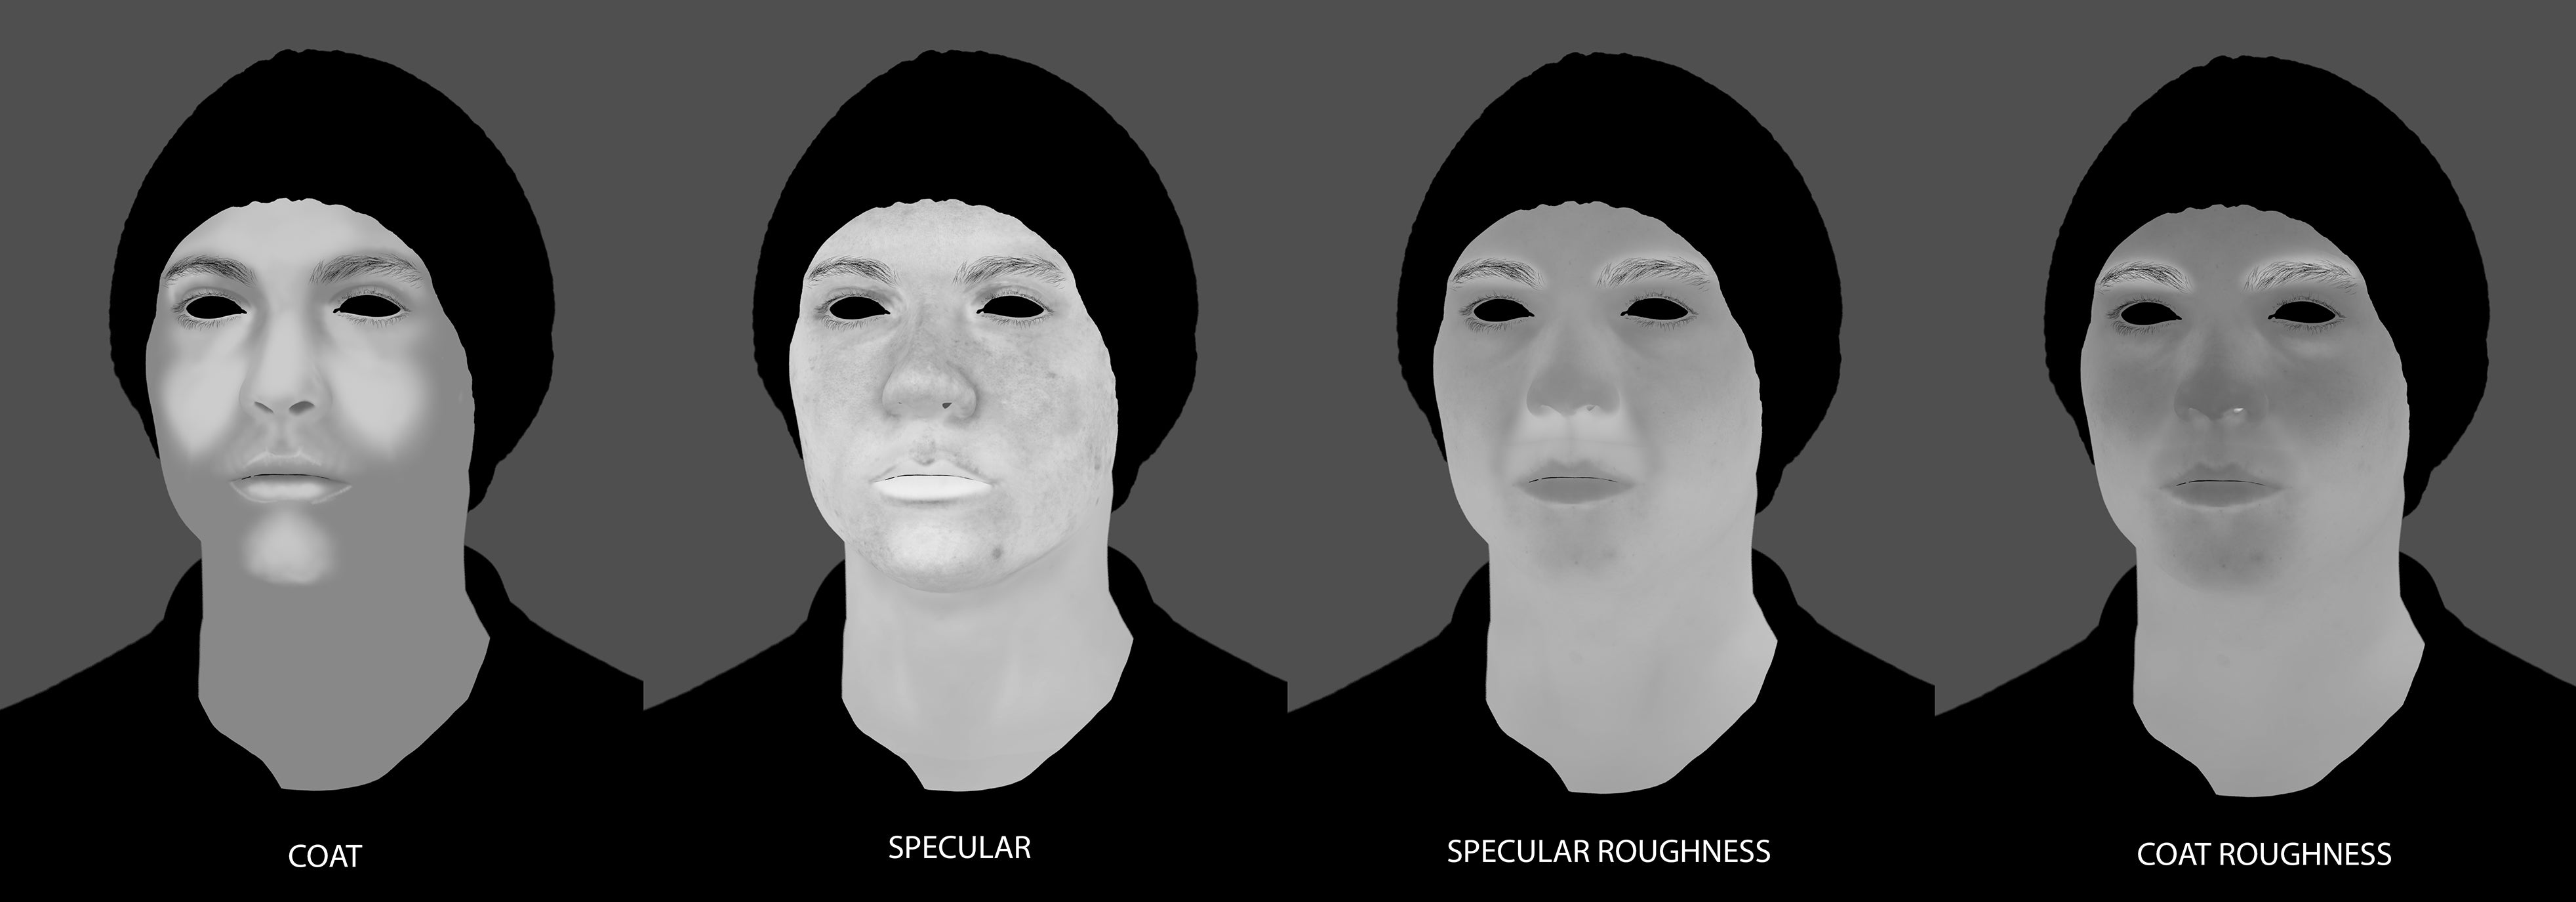
Once these were set-up, I began working on the other texture maps. Since the Uv's for this character was split into pieces, I couldn't simply paint changes in Photoshop as that would create visible UV seams in the texture. So these maps were painted in Mudbox (this is my painting tool of choice, use whatever works for you!) I imported the model and the specularity map into Mudbox and made changes to it, such as lightening the color of the lips.
I use a lot of reference material throughout the look-dev/shading process to ensure I'm capturing realistic skin. In my workflow, the specularity acts as the overall shininess of the skin, whereas the gloss layer serves as the oily zones of the face such as the forehead, nose and eye region. The following maps look as follows:
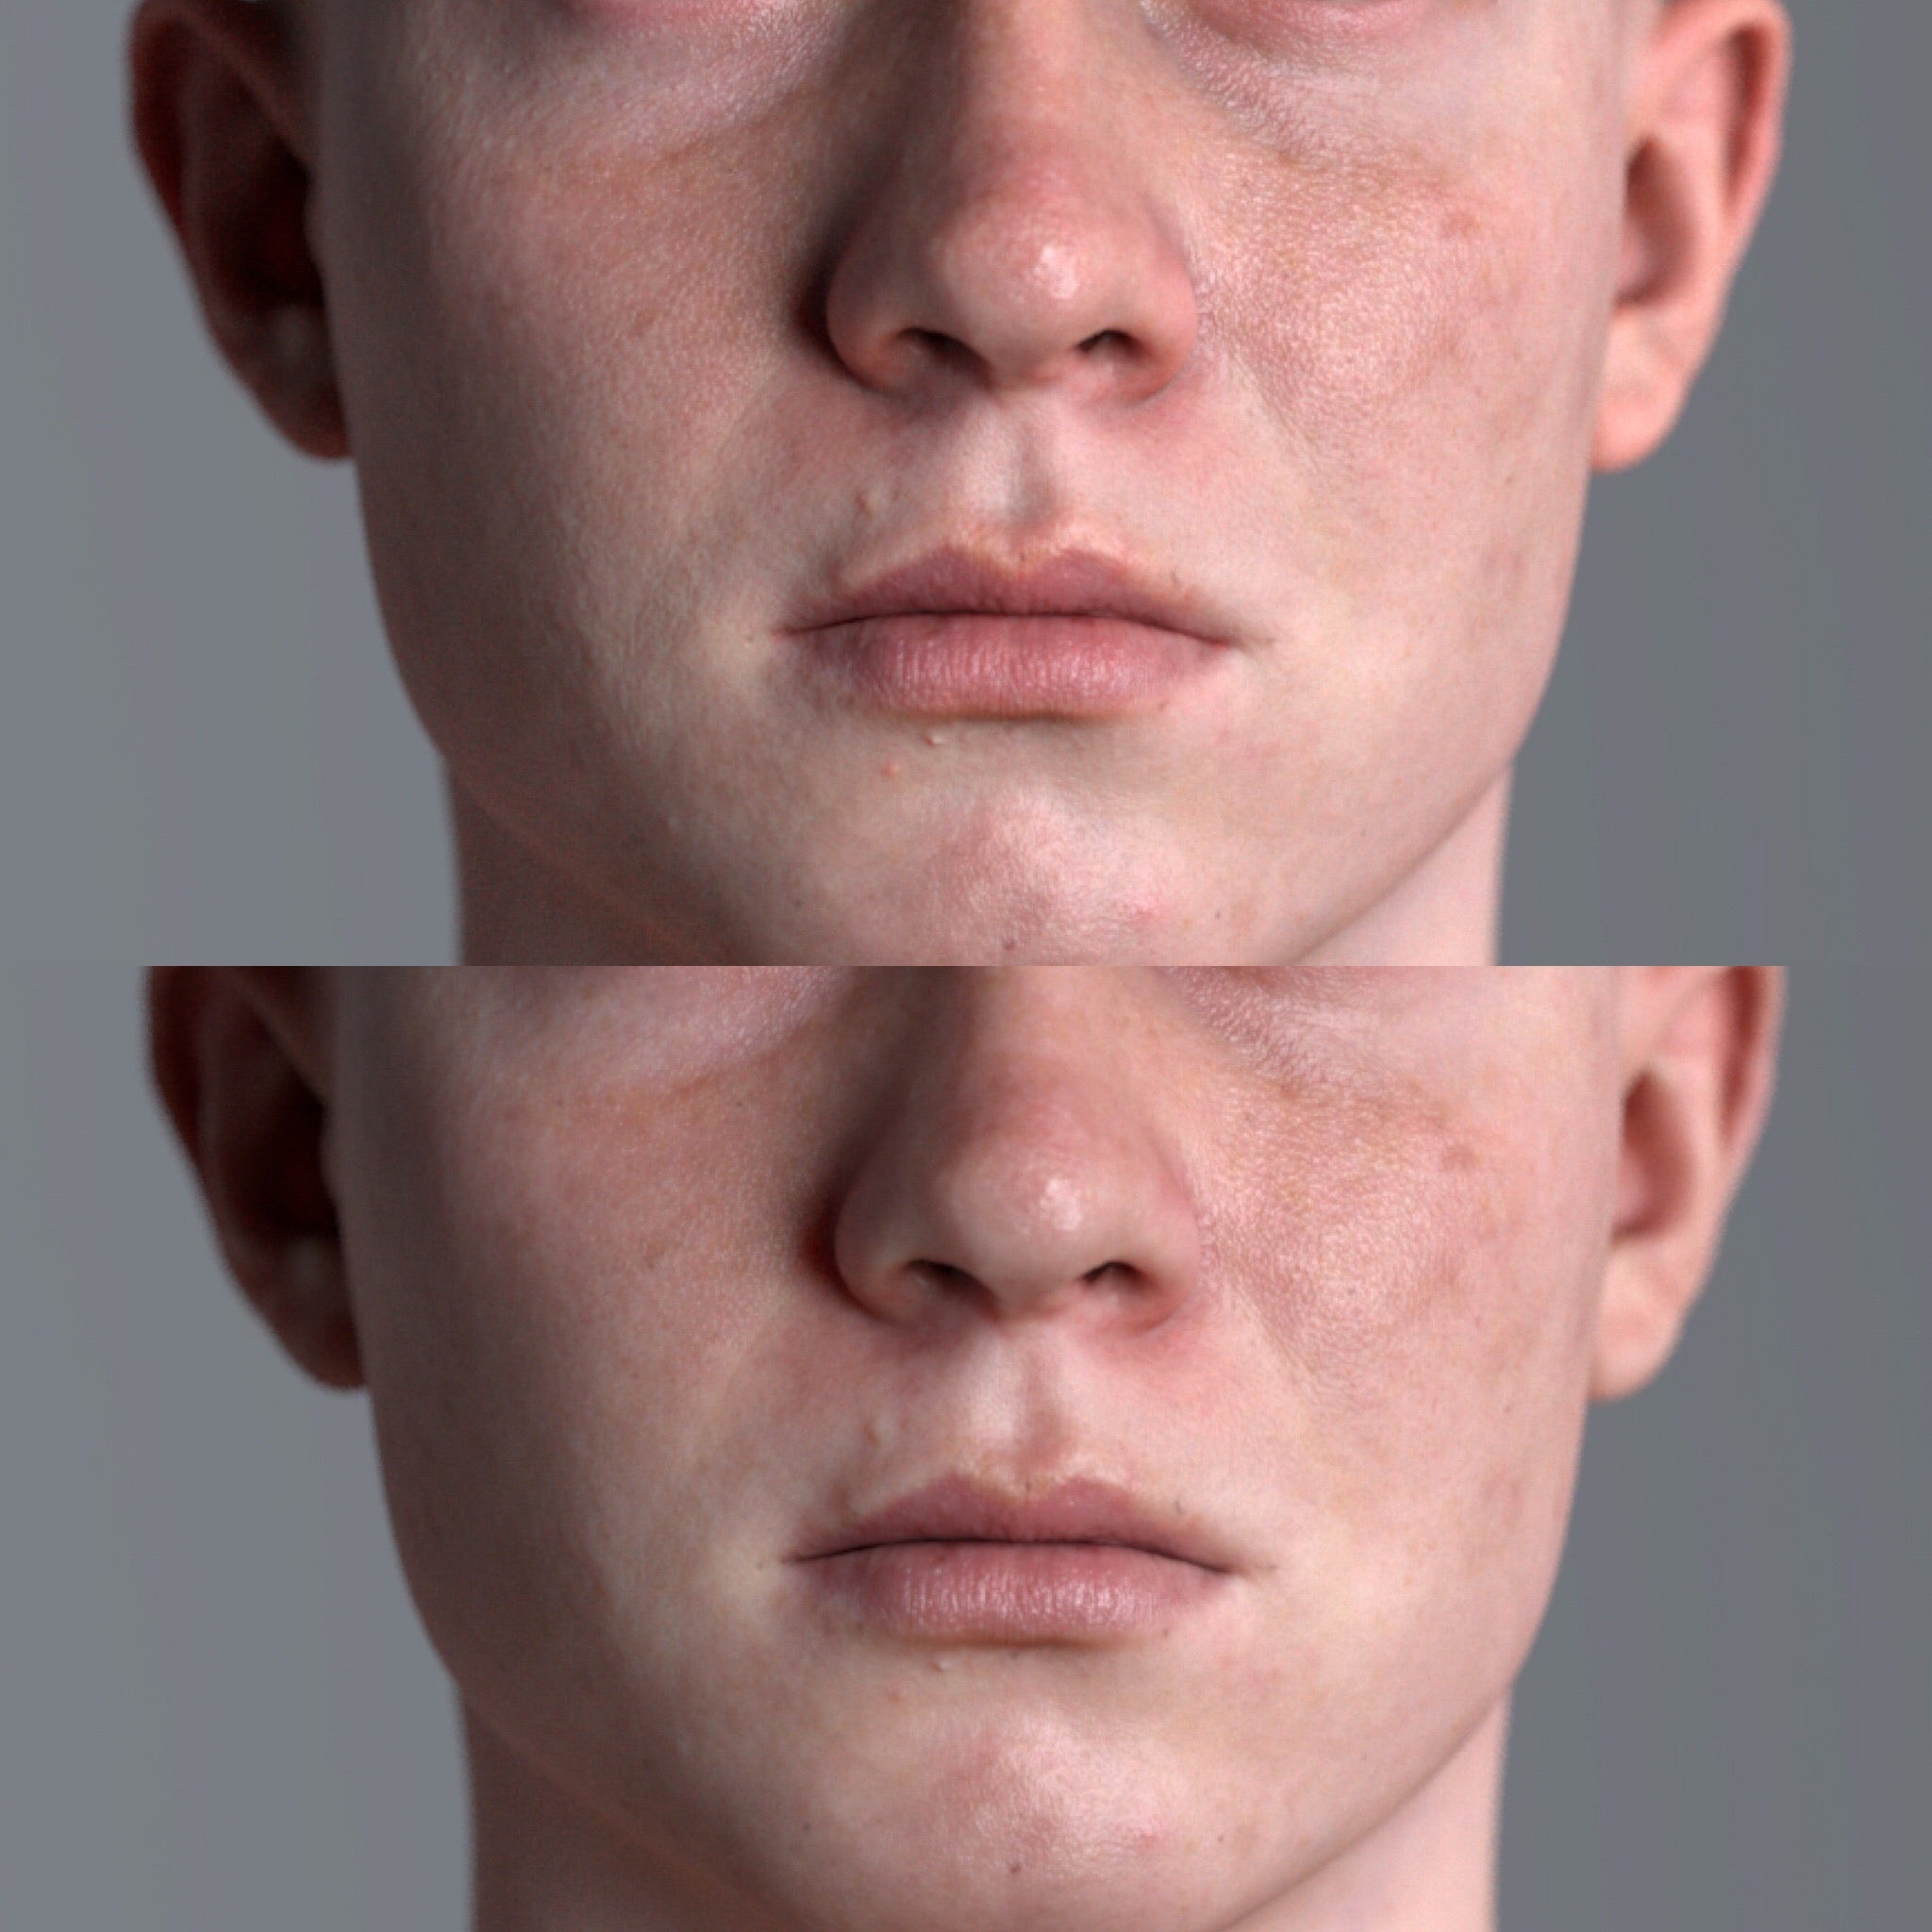
The specular and coat map were plugged into their respective weight attribute, making sure to attach the red channel of the texture file. The subsurface setting I used was randomwalk: this setting provides much better results compared to diffusion as it identifies areas in your mesh which are thin and intensifies the SSS effect, which is why I didn't paint a weight map for this character.
Instead, I painted a simple radius map. The lighter the red color, the stronger the effect; the darker the color, the less SSS will appear on the character. SSS occurs all over the face but is most noticeable on thinner areas of skin (eyelids, nose, ears) or parts that aren't obstructed by bone (like the forehead or chin).
Below is a comparison between the diffusion and randomwalk subsurface models. Randomwalk ( top) and diffusion (bottom).
Additionally, a method that I tried and tested involved using the coat normal attribute to push the skin detail. I made a copy of the displacement map and applied a high-pass filter in Photoshop, adjusting its value to pick up only the finest detail possible. I then imported this into the coat normal where it behaves like oily pockets in the skin.

Here are the final settings for the skin shader:
When shading skin, it’s always a good idea to change-up your light environment. You can get too comfortable in a particular light-setup and forget how different the skin can look when the character is in an external environment, for example.
Thank you for reading and I hope you found this helpful!
Feel free to follow me on my Instagram and ArtStation
| We would like to thank Sefki for his work and helpful contribution. If you're also interested to be featured here on a topic that might interest the community, feel free to contact us! |


