


Hey Darren, can you introduce yourself?
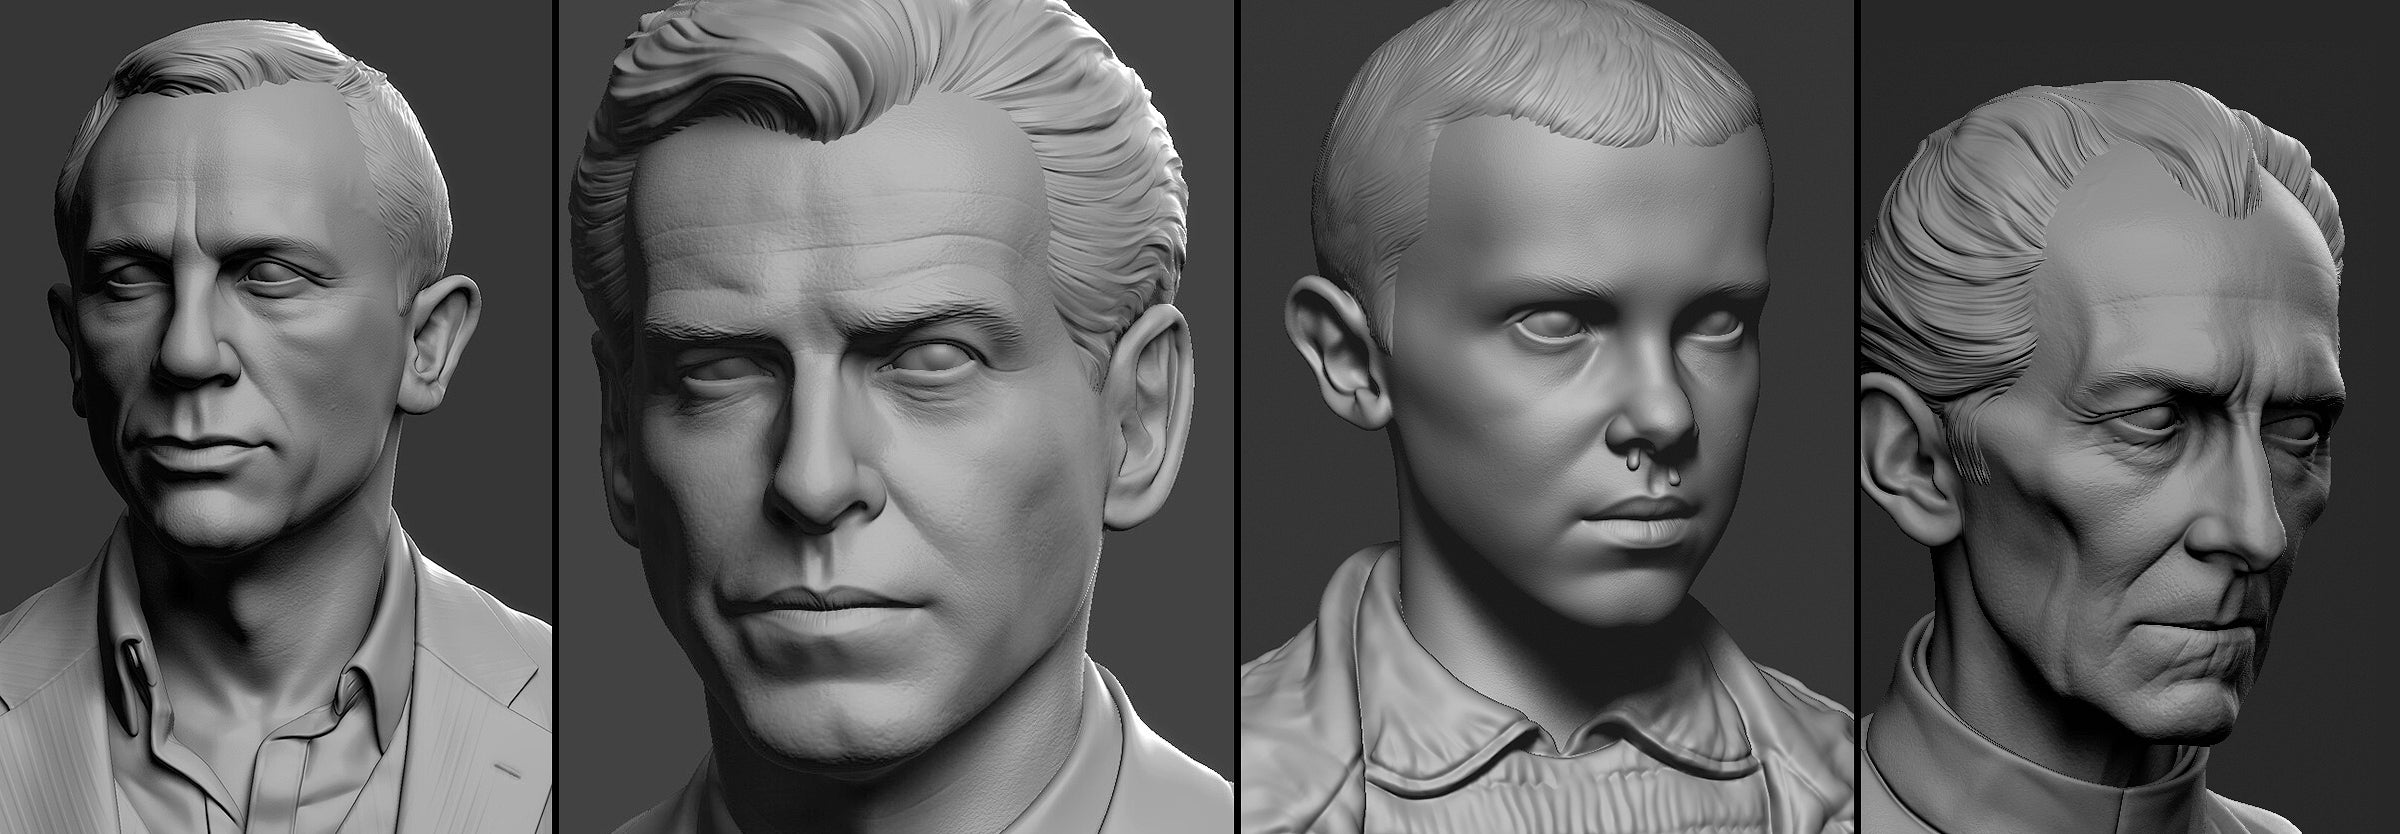
I’m a long time CG artist with a fairly broad range of skillsets. For the last few years, I’ve been working in games as an Art Director in California but recently made the colossal leap of leaving all that behind and returning to England to freelance. I’ve always been interested in the challenge of likeness work but more recently have become interested in getting work in the figures and collectibles space.
However, I didn’t think my work in that particular realm was good enough, so I set myself the goal of improving. Conclusion: likeness work is hard! So hard, that I wanted to share some of the things that took me too long to figure out on my own.
Reference
1. A really good orthographic side view is arguably more useful than a front one. Which is irksome because good profile shots are MUCH harder to come by! (so much so that I save them whenever I see them, no matter who the person is. I have a profile shot of Mark Zuckerberg in my possession, but have zero intention of ever sculpting Zuckerberg!). If you slice through a human head it’ll be obvious just how much more dimensional info about the features can be gleaned from the silhouette of a profile than a front view. Also, how far back the eyes sit in the skull is critical information that can only really be obtained from something close to a side view.

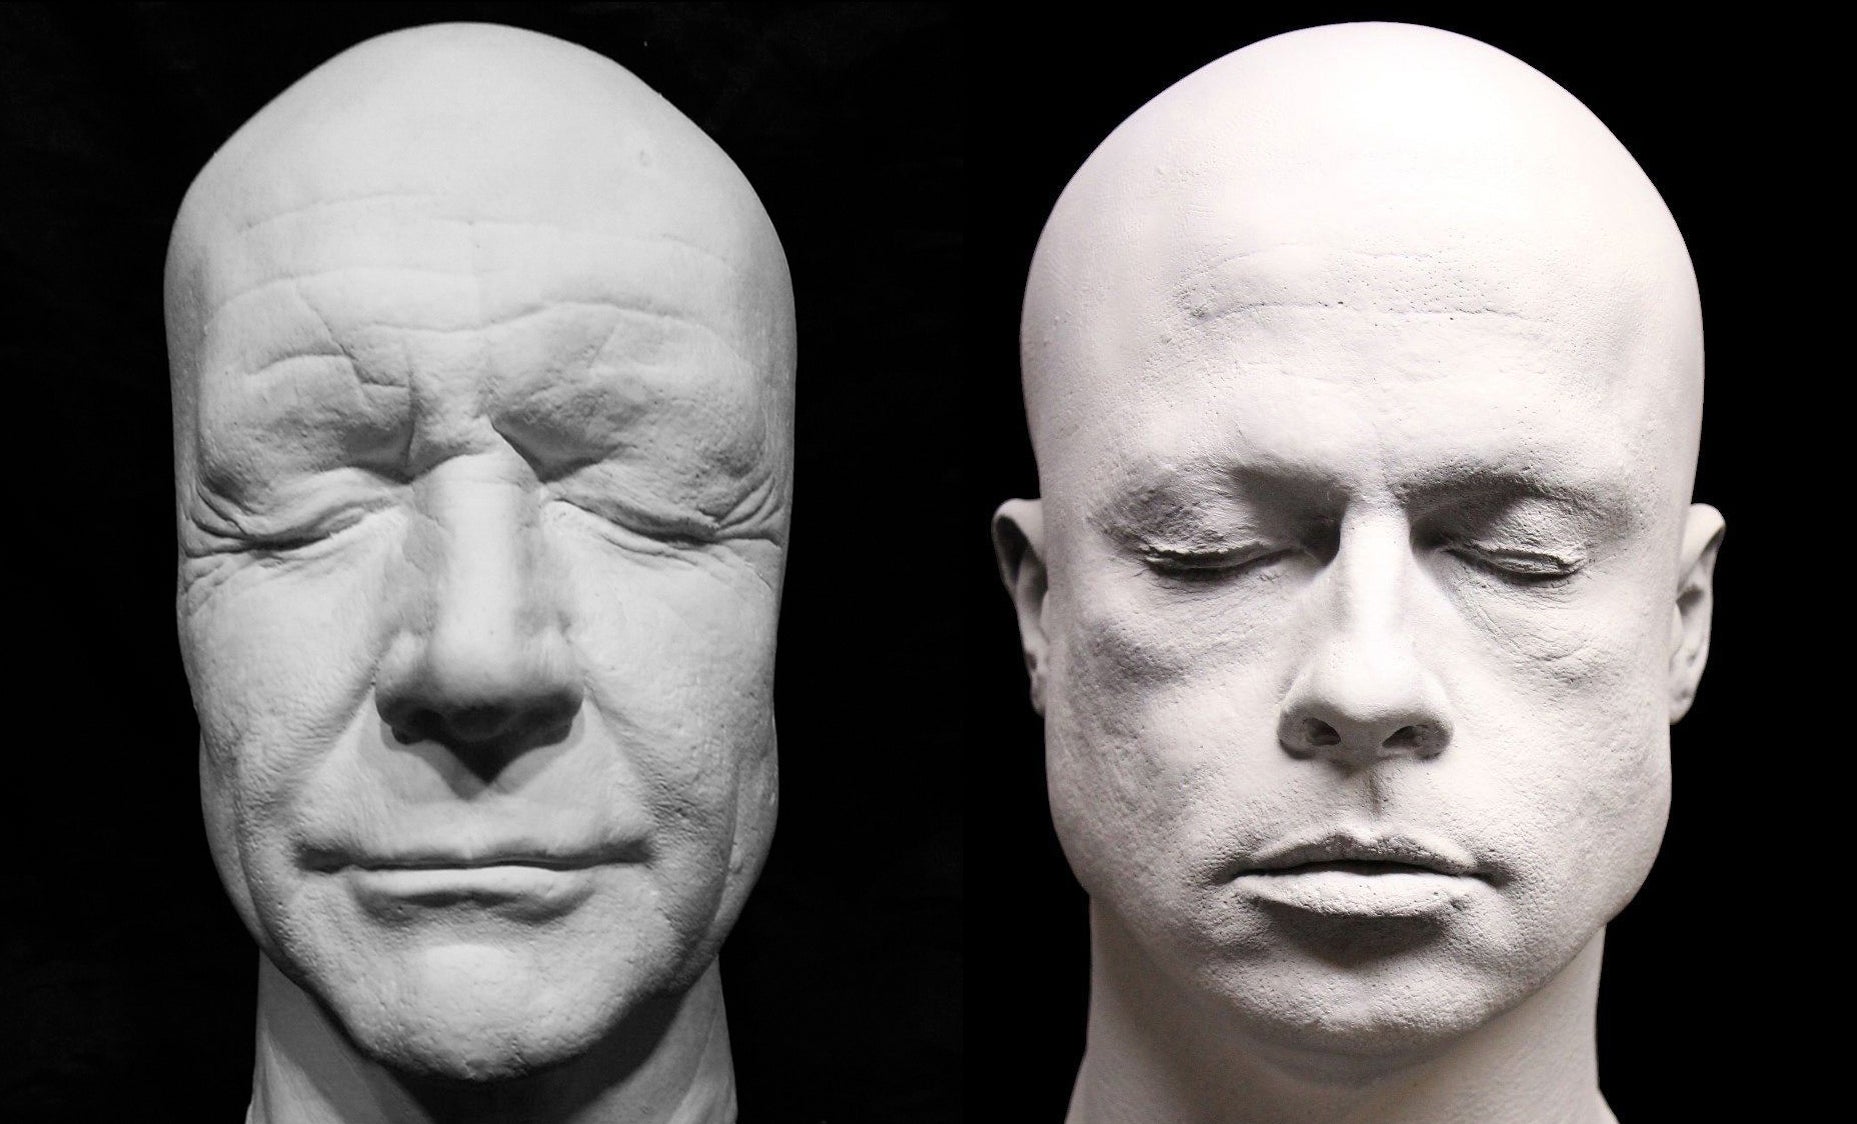
2. Think outside of the Google images box when reference hunting! For example, it’s possible an actor had a life mask made and it’s out there, perhaps on eBay or Etsy. Just be aware that there are good and bad life casts.
During the process of having one’s face covered in cold goo, it’s likely that extreme squinting or facial expression occurred. Both of these actors once won the ‘sexiest man alive’ award, guess which has the better life mask?
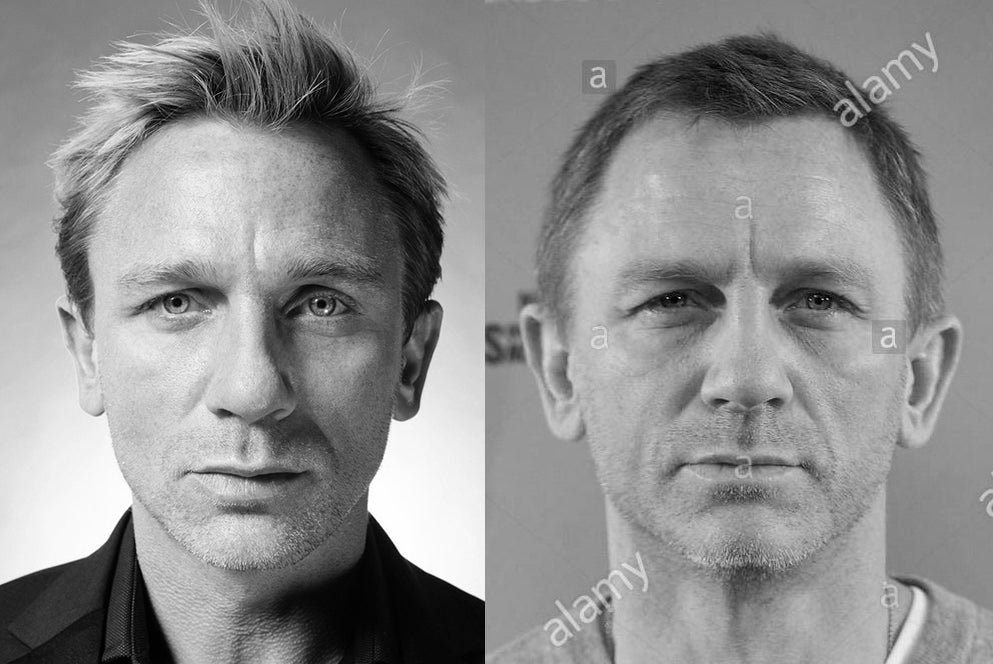
3. Front/side police mugshots are awesome too and let’s face it, if it’s an actor it’s likely a mugshot exists! Just be conscious of the position of the head in space. With Jack below, for example, it’s important to recognize that his head is tilted back 5 degrees or so:

Movie premieres or press events are good also because usually the photographers are kept some distance back from the stars, necessitating the use of a long lens and thus resulting in a more orthographic shot:

4. Of course, you need good side, front, ¾ and in between shots of your subject, but If you find them, shots from unusual angles can be extremely useful too and provide information that the default reference cannot:

5. Generally speaking, keep your reference collection within an age range of a few years. It’s surprising how much a human face can change over say, a 5-year period (this is exacerbated by having children, trust me).
That said, obviously, If you have a shot that provides particular information then use it, just know what to glean from it and what not to. Skulls don’t change over time, but skin, muscle, and fat do. This range might be a tad wide?

6. Recognize that different types of reference provide different information. Some reference shots are good for form (overcast day diffuse lighting), some for closeup detail, some for color, some for dimensions, etc..

7. Everyone has photographs taken of them where they don’t seem to look like themselves. Caught in mid extreme expression, or wondering If that leftover Sushi they had was in the fridge too long. If you get that sense from a photo, discard it. I’m sorry, you’re James who?

8. If you can find a 90-degree head turn captured from a movie, you’ve won the lottery! Although you won’t receive any cash because this is the ‘this will make my life much easier as a portrait artist’ lottery. It’s neither as well known or quite as life-changing as the Megamillions.
If your subject has apparently never turned his or her head through 90 degrees on film, you can actually make these yourself of course. You can then compare with your work at angle increments:

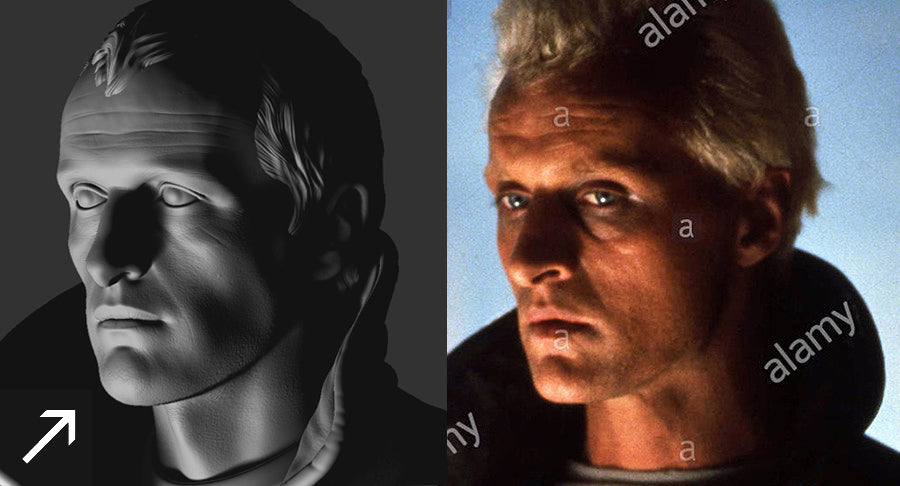
9. Think about cameras and how they’re bastardizing your precious reference. A long lens shot is going to provide a flatter, more orthographic image with less distortion of the face than a closeup. Usually, a person at the edge of a shot is going to be more distorted than one in the middle.
Increased awareness of the camera means that eventually, you’ll be able to look at a photo of a human face and understand how the camera might be skewing its dimensions. Different lenses and distances of subject to camera can make a person look very different (recognize that there’s an age difference below too). If you’re trying to measure distances between features, then absolutely go with the shot that has the longest lens every time. In this case the one at right:
10. Don’t just look at pictures of your subject. If possible, watch them move (just not captured in a well while you’re muttering something to them about lotion and skin). It is highly likely that you’ll pick up on things about them in motion that you just didn’t see in a still.
11. Fill in the gaps in your reference stash with generic anatomical reference and knowledge. Eyes are smaller than most people think, they also tend to angle outward very slightly, say 2 degrees. In a top-down view, skulls are a particular shape that tapers toward the front, keep skull ref. handy, etc.
12. If depicting a specific expression, find a target reference shot of it. Sculpting the person with a default expression then creating say, a smile from memory won’t work, because people’s smiles for example, are highly specific and unique to them.
Process
13. While good to approximate proportions, trying to directly accurately ‘trace’ side, front views in a modeling application is potentially problematic. The photos are never going to be truly 100% orthographic and thus results will likely feel a little off. You’re better off investing the time into getting good at eyeballing the relative distances between the features.
That said, semi orthographic images are still invaluable reference of course. One thing that I think does help, (assuming you have awareness of how the camera is distorting the face, see 9. above) is the use of Zbrush’s transparent UI feature and occasionally overlaying your model with a reference shot.
If you suspect for example, that your subjects’ eyes are too far apart, then do the same comparison with 3 or 4 different shots and If they all tell you the same thing, then your eyes probably are too far apart. I know some folks use ZApplink too and get good results from it, but you need to be hyper-aware with any kind of tracing/overlaying technique of what’s happening in terms of camera parameters in both your reference and modeling application. Because there is a slight danger here of a 3D model ending up only fully working from one angle.
14. Whenever possible (trickier on a deadline), take a break from your work and return to it later. I guarantee that you WILL see things that are off that you just didn’t before. I recognize that this is completely absurd, but I personally have digital models that I’ve iterated on over a 10+ yr. period (and yes, the difference is laughable).
15. Learn to take critique! Did I stress that strongly enough? No? OK Get a thick skin for Chrissakes! Realize that it’s just another useful tool. Ask someone their thoughts on your progress (and yes, this person could even be one of the great unwashed, a ‘non-artist’!) A fresh pair of eyes is a useful thing when you’ve been working for many hours on something in a bubble. I’ve worked with too many artists that are uncomfortable with critique. If this is you, you’re literally holding yourself back and this goes way beyond sculpting likenesses. External critique is also a great way to find that one thing you repeatedly do wrong that many artists have. Just Be Humble.
16. Periodically get your model out of Zbrush or wherever you’re working and into other environments to see how it looks in different camera and other conditions. If you have a 3D printer even better. I do quick small test 3D prints just to bring my WIP model into the real world and when I do, I always see stuff that I didn’t see in Zbrush.
17. You can use light to help you too. Match lights in your modeling program with the lighting in your reference, to see how the undulations in the surface of the face might differ:
18. Regardless of final hair technique, block in some super rough geometry hair early on. A person’s hairstyle and where their hairline meets their face is a highly unique and recognizable aspect of them.
Also, this isn’t easy of course but be on the lookout for a reference shot of your subject bald, or close to it. If you can get the overall skull shape down then a lot of other things will tend to fall into place. Prepare to be shocked at how odd some people’s skull shapes are:

19. Stop with the skin pore and other micro detail early on nonsense. Get the forms and proportions right first, worry about that stuff later.
20. Recognize that human faces can be highly asymmetrical, even attractive ones, and seek out that asymmetry. Shannen Doherty is an extreme example in that her eyes are at quite different heights. Beware of ref shots online that might have been mirrored. Easy to tell with David Bowie perhaps but harder with other folks! These two make quite the pair. They should host the annual ‘Highly asymmetrical Hollywood stars’ convention:

21. Save a new version every time you make a significant change, then compare with the previous version to confirm that it was actually an improvement. Sorry clay sculptors you talented bastards. Likenesses are difficult, even Madam Tussaud’s doesn’t nail it every time. But like anything else in life the more you do it the more you’ll improve. I hope this helps!
| We would like to thank Darren for his helpful contribution. If you're also interested to be featured here on a topic that might interest the community, feel free to contact us! |