


Micro Fabrics in Substance Painter by Jonas Skoog
In this tutorial I will go through my workflow for using micro fabric maps in Adobe Substance Painter.
After seeing Michael Cauchis tutorial on using these maps in Maya I wanted to try out how that could apply in Substance Painter.
I wanted the process to be easy to set up by using all maps directly without combining anything before hand.

For this to work I had to find a way to use the ID map as base color much like the setup in Maya.
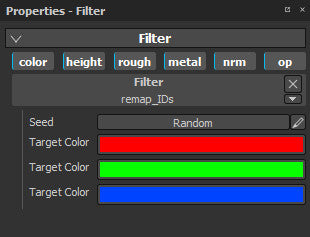
The trick would be to isolate each channel and remap its color to my liking.
Unfortunately I was not able to find an easy way to do this inside Painter in the way I wanted so I decided to create a simple filter inside of Substance Designer instead to fill my needs.

Designer is a really powerful software which lets you create procedural node trees and output both functions and materials.
I could have easily created the entire setup with micro fabrics within Adobe Substance Designer but for the purpose of this tutorial I chose to just output a function for Painter to show the bond between these twin softwares.
Adobe Substance Designer viewport
To create a filter the easiest way is to just choose a “Painter Filter” template when starting a new substance graph. This will give you two nodes, one input and one output.
Since I want to modify an albedo I make sure both of them are set to “base color”.
Up next is adding a RGBA Split node which lets me separate these channels and hook each of them up with a “replace color” node. The source color of these nodes are set to white to pick up the channel much like a mask and the target color gets exposed so that I can modify it in painter later on.
The last thing to do is just adding the channels back together again with a few “blend” nodes and plug them into the output and we have ourselves a filter ready to be exported to Painter.

Back in Painter simply add the filter to your Fill layer and change the color of the ID map plugged into the base color slot.
.
 .
.
Setting up a basic material from the three maps is very straight forward:
- Begin by creating a Fill layer and add the ID map to the base color slot
- Add the displacement map to the height slot
- Add the opacity map to the opacity slot.
- (I also plugged the height into the roughness to get some variation to start from)
In order to use opacity in painter you will have to switch to the pbr-metal-rough-with-alphablending material and make sure you add opacity to your channel stack.
Collecting all three textures in the same Fill layer gives you the ability to tile them all at ones to make sure they all stay consistent.
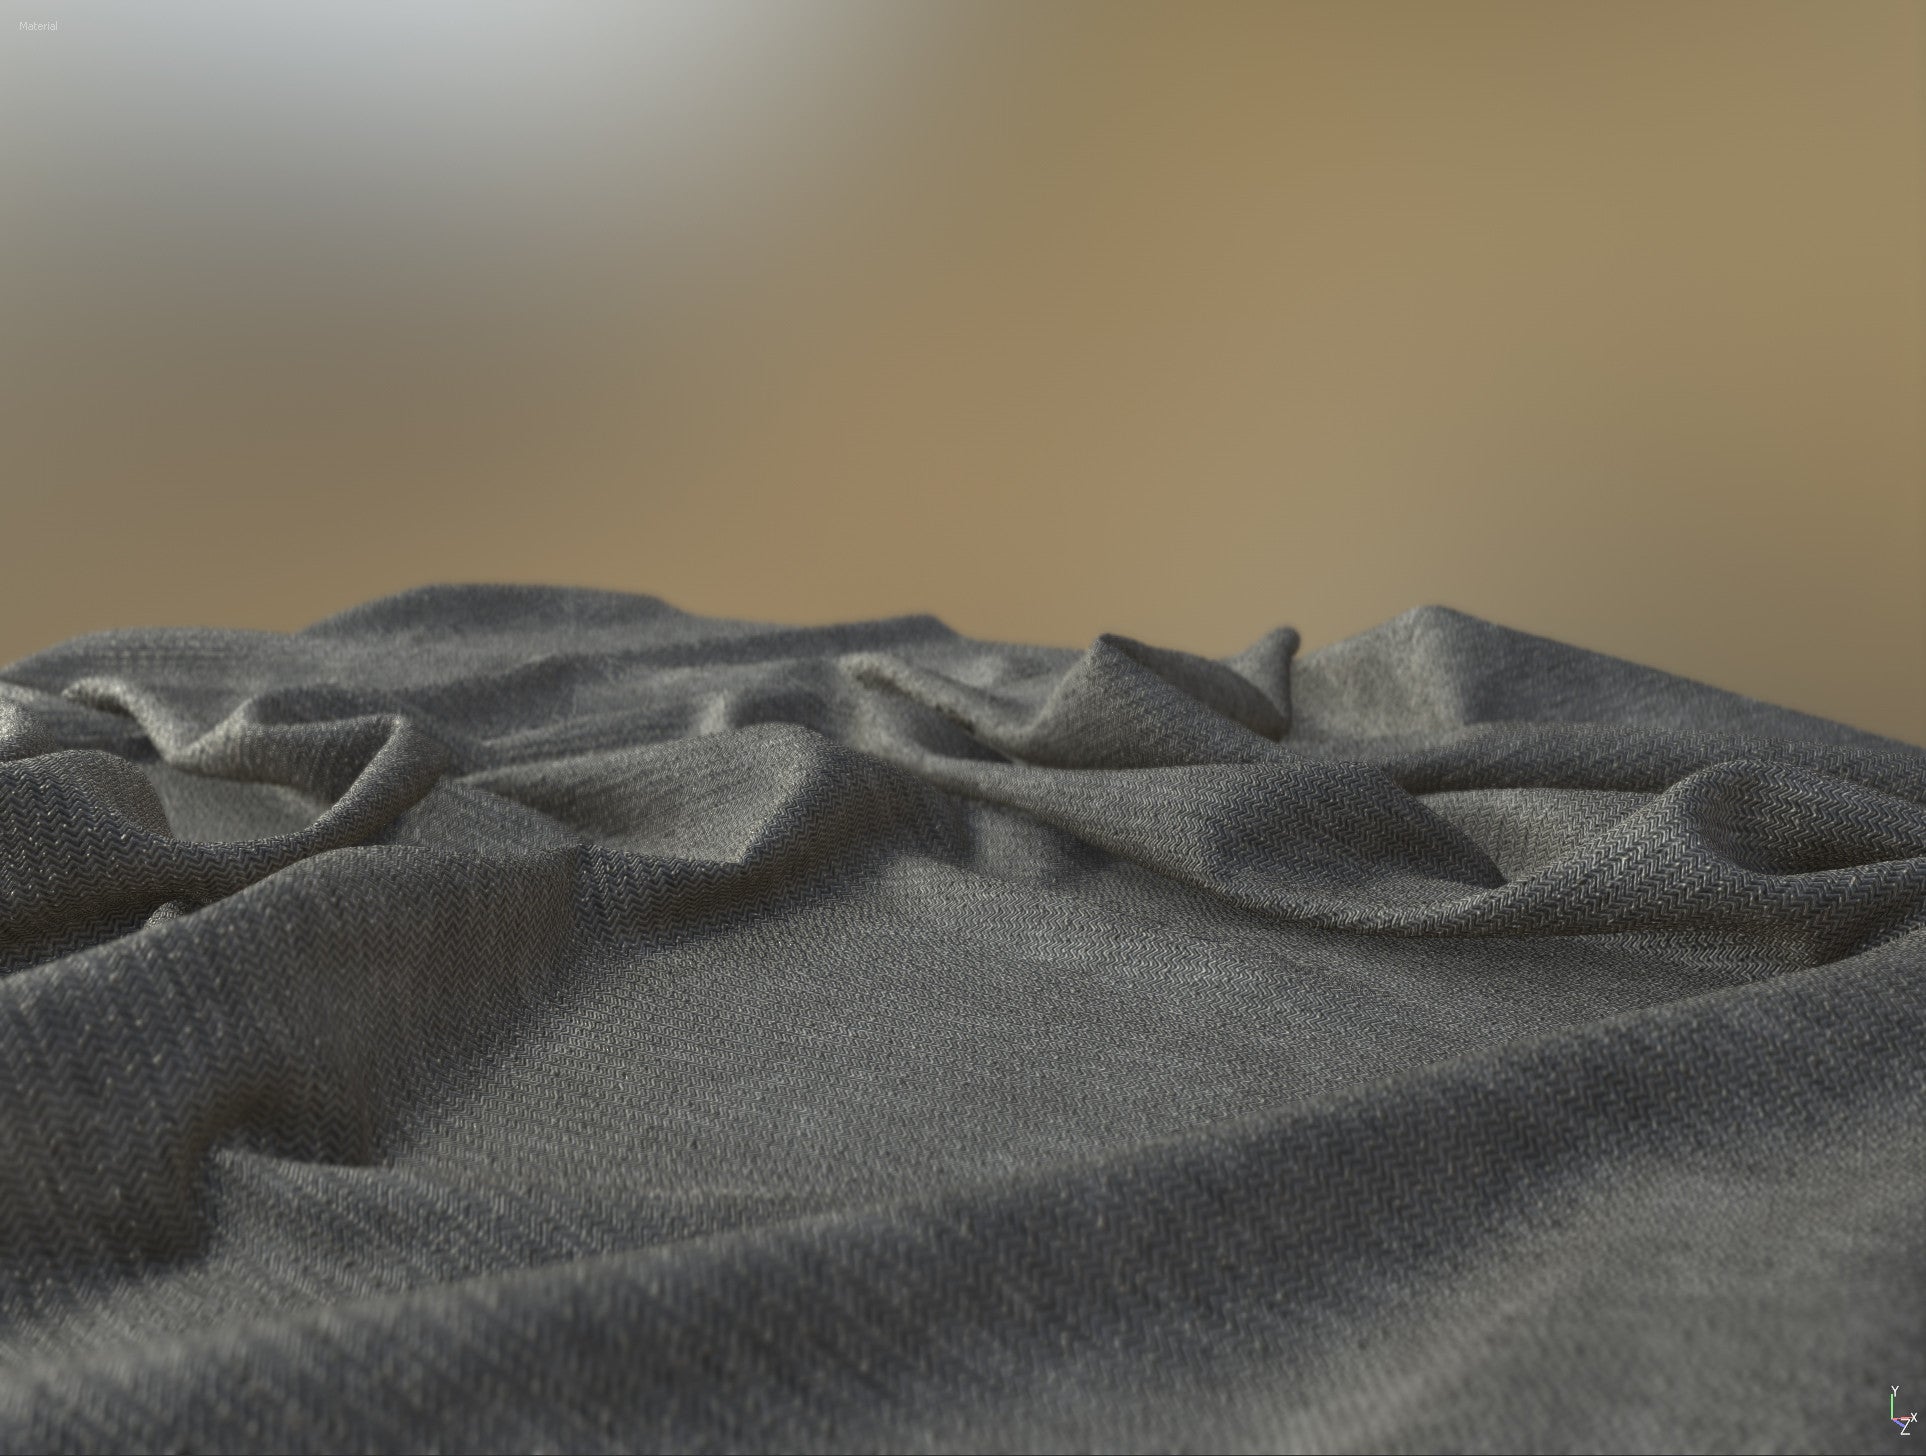
 Substance Designer Iray render
With all textures in place and our remap_ID filter assigned we have a solid base to work from.
Now all you have to do is layer things on top to give your cloth personality.
I began by adding a warp filter to distort the fabrics slightly and a few level adjustments to dial in the roughness and height.
All other layers on top are just to add variation and break up the cloth surface.
As with all tilable textures there will of course always be a chance of seeing the repeat when used straight out of the box. To counter this you will have to break up the surface with color variations, patterns and dirt/wear. This is pretty much the same whether you are creating a shirt or vast landscapes.
The trick is always break-up!
In painter you have a big supply of procedurals, grunge and different filters at your disposal.
Adobe Substance Designer Iray render
Hope this tutorial has been informative towards using micro fabrics from Texturing.xyz as part of your cloth creation inside Adobe Substance Painter and may help spark other ideas on how to use these great textures in your own workflow!
/Jonas Skoog
http://jonasskoog.com/