

Hi there, my name’s Robert and I’m a 3D Character Artist from Australia. Broadly speaking, I don’t really find anything more satisfying than pushing the quality of my Art and generally just improving my skills.
I think I live by this ideology as I spend nearly all my free time doing personal art. I’m currently a Character Artist at Electronic Arts in Vancouver, Canada.
This article will focus on how I approach using texturingXYZ in my personal art, specifically my latest realistic real-time game character art project - Jonathan Ingram. The reason being that there aren’t currently many tutorials/blog posts on the site with a focus on game art.

I’d like to share a couple of methods used on this project to compensate for the fact that making characters for games have a lot of challenges that other 3D mediums don’t. This post will discuss enhancing our XYZ projected displacements and cross-polarized skin color projections using Zbrush, Photoshop and Substance Painter.

The Displacement
Due to the nature of game characters (normally) having one UV set for their head’s texture, exporting the projected texturingXYZ displacement map out of Mari results in a lower quality texture map than the raw XYZ displacement. However, you are to sculpt extra detail on layers in Zbrush to further enhance the XYZ maps created.
Applying the created displacement projection textures on layers is a great approach.
Layers are useful for retaining information in a non-destructive way. Projecting the tertiary and secondary displacement maps in Mari is a good idea (a lot of tutorials on the site cover this process). It’s awesome to have both maps as both are used in Zbrush, applying them to two individual layers. Now through additional sculpting, the XYZ applied displacements can be enhanced.
XYZ displacement projections act as great surface level information, but they really need some underlying breakup on the skin to help ‘ground’ them on the model. This is where Zbrush’s noisemaker comes into play. I used noisemaker to add some soft surface detail to the skin (masking out areas like lips, eyelids) just to help ground the actual pores a bit more. You can replace noisemaker with custom alphas, whichever option appeals to you more.

TexturingXYZ has some really great tile displacement maps as well. Using the XYZ Micro Skin Face displacements as alpha brushes additional information can be sculpted into the model.
This process of doing a manual skin-pore pass really helps with breaking up the Tertiary and Secondary XYZ pore layers. It’s important to remember that throughout this entire process of adding additional detail subtlety and constraint should be used, while also acknowledging that certain pores only go on certain areas of the face and to stick within those pore-types for said areas.
I have found that pushing the sculpt a little further and adding a little additional breakup translates well when eventually the head is made into a game-ready model, baking normal/ao/cavity maps etc. This is a good point to add additional pores by hand. Doing manual pores using a dot brush, usually on the tip of the nose and along the nasolabial fold (depending on the person’s complexion, again case-by-case). Along with manual pore sculpting, more definition can be added now to skin folds or to define some muscle/bony landmarks/fatty pads on the face, all on alternate layers in case there need to be changes down the line.
Part of this workflow relies on the sculpt having skin pores established before adding in slight definition to creases, make general shape fixes on the skin and add subtle landmarks. It can be hard to recognize just how defined all of the secondary forms would be without having skin pores on the model. Having been able to sculpt some of these details after doing most of the pores gives a much better idea and representation of forms on the final model.


Cross-Polarized Images
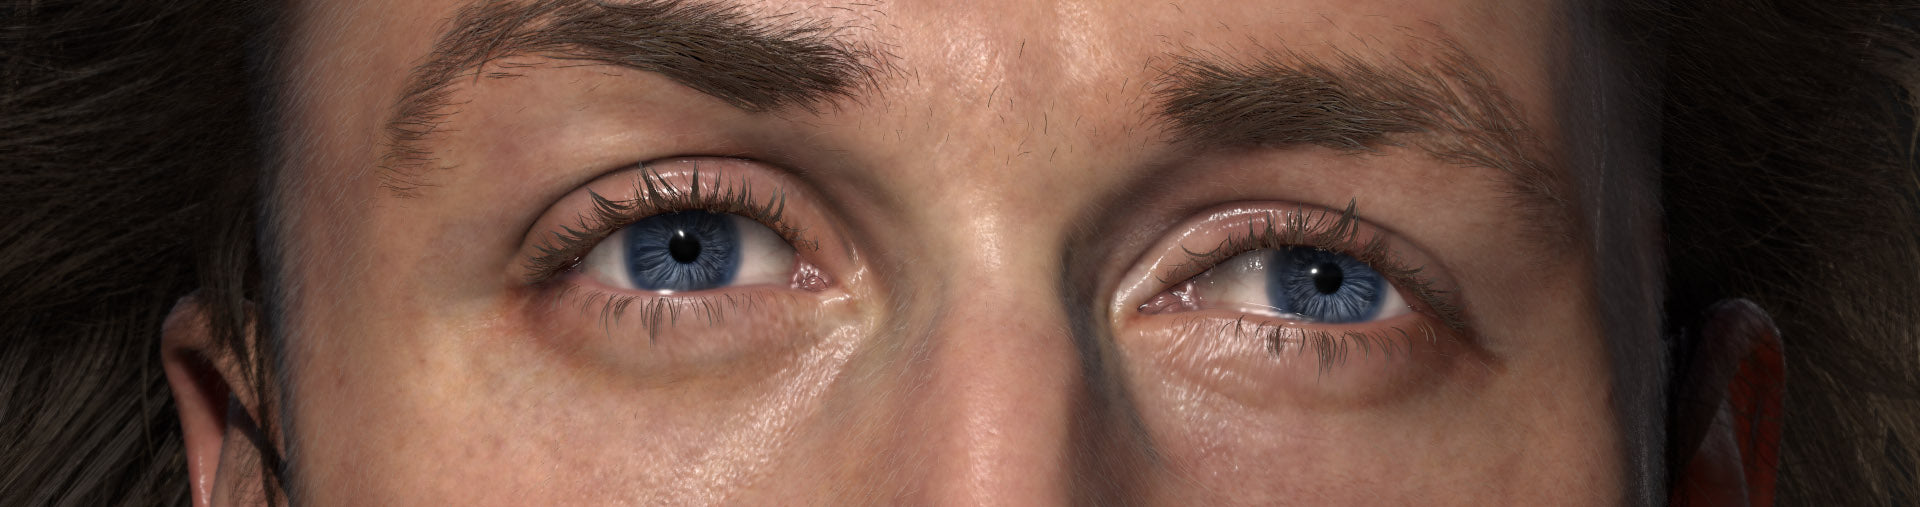
The approach for this character’s skin texture was quite straightforward. The cross-polarized images were used as the base texture which was built upon with additional texture information (facial hair, eyebrows etc).
XYZ’s cross-polarized high-quality images make for a fantastic base texture as there’s information to cover the entire head. With these images, you have the benefit of having subdermal skin information present too, like blood vessels and mottling which can help add a lot of personality to a character. This creates more detail which can often be really beneficial for realistic game characters as they usually don’t have dedicated subdermal skin texture maps.

On the topic of subdermal texture information, adding a red mottling pass to the skin helps push the skin and makes it feel more alive. The same mottling pass was also created for the neck and arms.

The mottling creation method is actually quite simple, it’s a Fill layer in Substance painter with a cloudy brush and a high noise scale. This creates a really fantastic breakup. The Painting layers are there just to break up the mottling further to soften or remove it entirely from certain parts of the face (mostly mouth, eyelids).

To push the mottling further we can do several layers with a variety of intensities while using different alpha brushes. This is actually quite important to do or else the mottling looks too uniform or “samey” across the face. The way I approach this is quite artistic in the sense that I just put it in areas I think look good. Though it is important to consider what part of the face has the most mottling (Usually cheeks, nose).

Lastly, for skin enhancing in substance painter I created another mottling pass but tweaked some of the red values along with the alpha of the layer’s fill. Applying this to the lips and doing some minor tweaking gave really nice breakup to them. I felt the character's lips looked too lifeless in the game engine despite the texture being photo reference. By enhancing it slightly to give it more red values made the lips feel significantly more lifelike.


Tips for Aspiring/Professional Artists.
- Do personal art, as regularly as possible... like every day. Do studies in your weak areas and try to approach each personal art project with a different goal so that you learn something new as well as improve your overall art skills.
- Seek critique from your peers and mentors regularly, this should always go hand-in-hand with doing regular personal art, the more feedback you can get from experienced artists the better.
Shoutouts.
I’d like to take the opportunity to thank my mentors, I’ve learned so much from them and I owe them for pushing and encouraging me to improve. Thank you Liam Grice and Glauco Longhi. You guys are awesome. I’d also like to thank my friends and peers who have also given me regular feedback on my work, thank you! Last but not least, TexturingXYZ for offering me the opportunity to write an article for the site.
Thanks for reading over my article! I hope some of these breakdowns and tips help you push your game character’s skin further.
| We would like to thank Robert for his work and helpful contribution. If you're also interested to be featured here on a topic that might interest the community, feel free to contact us! |